 how-to
How to Inspect Your Roof After a Storm: A Homeowner's Guide
Table of Contents
- How to Inspect Your Roof After a Storm: A Step-by-Step Safety Guide
- Signs of Storm Damage on a Roof: What to Look For
- Your Roof Storm Damage Checklist for a Thorough Inspection
- How to Document Roof Damage for Insurance Claims
- What to Do After Storm Damage to Your Roof: Immediate Next Steps
- When to Call a Professional Roofer for a Storm Damage Assessment
- Conclusion: Protecting Your Home After the Storm
- Frequently Asked Questions
Last Updated: October 12, 2026
How to Inspect Your Roof After a Storm: A Step-by-Step Safety Guide
Knowing how to inspect your roof after a storm starts with one rule: stay on the ground. Most roof injuries happen when homeowners climb up themselves. Look carefully from your yard, then check your home's interior.
Homeowners who document damage early and call a professional quickly tend to have smoother insurance claims.
Step 1: Wait for the Storm to Pass and Assess Conditions
Don't start while rain, wind, or lightning is active. Wait until the weather clears, then let the roof dry.
Before you step outside, check a few things:
- Are there downed power lines near your home? If so, stay inside and call your utility company.
- Are there large, hanging branches overhead? Keep your distance.
- Is the ground around your house stable, or is it flooded or muddy?
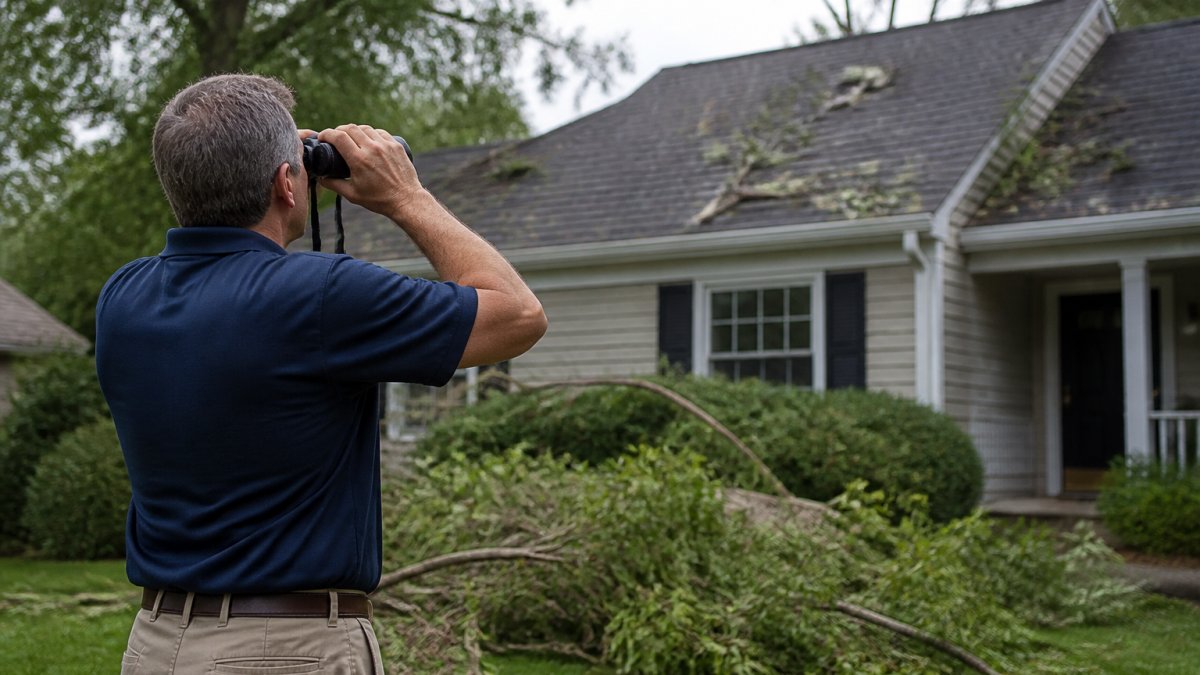
Once conditions are safe, grab binoculars, your phone, and a notepad. Binoculars let you see shingle detail without climbing.
Step 2: Perform a Ground-Level Inspection
A ground-level inspection is the core of checking your roof without leaving the yard. Walk the full perimeter slowly and view each section from several angles.
Here's how to do it well:
- Start at one corner and work around in a full circle.
- Stop every few feet and scan the slope, ridge, and edges.
- Use binoculars on anything that looks off.
Most storm damage is visible from the ground once you know what to look for.
Signs of Storm Damage on a Roof: What to Look For
Storm damage on a roof shows up in predictable ways. Learning the signs helps you spot problems before they become leaks or structural issues.
Damage to Shingles, Flashing, and Vents
Shingles take the hardest hit. Check for:
- Missing shingles, bare patches where shingles have blown off entirely
- Cracked shingles, visible splits or breaks in the surface
- Curling shingles, edges lifting or peeling upward
Flashing is the metal material that seals joints around chimneys, vents, and roof valleys. Damage here is easy to miss but causes serious leaks. Look for bent, lifted, or separated flashing around chimney and vent penetrations per NRCA guidance.
Roof vents can also crack or get knocked loose. Check that each vent sits flat and flush against the roof.
Gutters, Downspouts, and Roof Perimeter Checks
Your gutters reveal your roof's health. After a storm, check for:
- Shingle granules collecting in gutters and at downspout openings
- Debris like leaves, twigs, and fallen branches
- Loose or sagging gutters pulled away from the fascia
Heavy granule buildup warns that shingles are wearing down or were damaged by impact. Note anything displaced around the perimeter, small details often point to bigger problems up top.
Your Roof Storm Damage Checklist for a Thorough Inspection
A roof storm damage checklist keeps you from missing anything. Use it after every severe storm.
Exterior checklist:
- Missing, cracked, or curling shingles
- Dented or displaced shingles
- Damaged flashing around chimney, vents, and valleys
Interior checklist:
- Water spots on ceilings
- Stains on walls, especially near the top
- Attic inspection for daylight, dampness, or dark streaks
How to Document Roof Damage for Insurance Claims
Learning how to document roof damage for insurance is one of the most valuable things you can do after a storm. A clean record smooths the claims process and reduces disputes, and your first 48 hours can affect what gets paid.
Build a damage log that holds up
How to build a strong damage log:
- Photograph everything. Take wide shots of each roof section, then close-ups of specific damage. Include a common object (a coin, a tape measure, a hand) so scale is obvious.
- Record video. Walk the perimeter and narrate what you see, date, time, weather, and what you're looking at. Video captures context photos miss.
- Note the date and time. Insurers want to match damage to a specific weather event. Pull the storm date and time from a local weather source and save a screenshot.
- Log each issue. Write down what you found, where it is, and how severe it looks. Number each item for later reference.
- Keep receipts. Save every receipt for tarps, plywood, or temporary repairs, these are usually reimbursable under your duty to mitigate further damage.
The claim process, step by step
Most policies require prompt reporting and damage prevention while your claim is processed. The usual sequence:
- File a first notice of loss (FNOL). Call your insurer's claims line or file online. Write down your claim number and use it on every future call.
- Ask about your deductible and policy type. Most homeowners policies cover storm damage on a replacement-cost basis, but some are actual cash value (ACV), which pays depreciated value. Know which you have before the adjuster arrives.
- Schedule the adjuster visit. Ask whether the adjuster will inspect in person or use drone imagery. If you have a trusted contractor, ask if they can be present, many roofers meet the adjuster on-site at no charge.
- Review the adjuster's report. You'll receive a scope of loss listing covered items and a payment breakdown. Compare it line by line against your damage log. If items are missing, request a re-inspection.
- Understand the payment structure. Most replacement-cost policies pay actual cash value first, then release recoverable depreciation after the work is complete and you submit the final invoice.
Deadlines and traps to watch
- Prompt notice. Policies typically require notice within a reasonable time, often immediately or within a set number of days. Delays can give an insurer grounds to reduce or deny a claim.
- Proof of loss. Some insurers require a signed, sworn proof of loss within a set window (commonly 60 days from request). Missing it can forfeit the claim.
- Assignment of benefits (AOB). Some contractors ask you to sign an AOB, transferring your claim rights to them. It's legal in many states but tied to inflated claims and disputes. Never sign a contract or AOB before your insurer has reviewed the damage.
Check your policy or ask your adjuster about deadlines, which vary by insurer and state. Put every communication in writing for a dated record.
What to Do After Storm Damage to Your Roof: Immediate Next Steps
Knowing what to do after storm damage to your roof comes down to three priorities: safety, stopping further damage, and starting the claim. Your first move depends on storm type and severity, use the triage guide below.
Triage: how urgent is this?
Evacuate and call 911 if you see:
- A sagging or bowed ceiling, or a ceiling that is visibly holding water
- Sparking, buzzing, or burning smells near wet electrical fixtures
- A gas smell, or a roof section that has partially collapsed
Call a roofer today (same day) if you see:
- An active leak dripping into living space
- Missing shingles over a large area, or exposed underlayment or decking
- A tree limb resting on the roof, even if it looks stable
Schedule an inspection this week if you see:
- A few lifted, cracked, or displaced shingles
- Granules in gutters but no interior leaks
- Dented gutters, downspouts, or siding with no water intrusion
Storm-specific first moves
Different storms cause different damage, so the first move changes with the event:
- Hail: Check gutters, downspouts, AC condenser fins, and metal roof vents for dents. Hail damage to shingles often looks like small dark spots or soft, bruised areas, not obvious holes. Photograph soft-metal dents; adjusters use them to corroborate shingle damage.
- High wind: Look for missing or creased shingles on the windward slope and along ridges and edges. Check that ridge caps and hip caps are seated. Wind can lift flashing without tearing shingles, so inspect chimney and vent seals closely.
- Heavy rain: Focus on interior signs first, ceiling stains, attic dampness, musty smells. Rain rarely damages shingles directly but exposes every existing weakness. Check that gutters and downspouts flow freely.
Temporary leak mitigation you can safely do
For temporary leak mitigation, focus on what you can do inside, leave the roof to trained professionals.
- Place buckets under active drips with a towel or plastic sheet beneath to protect flooring.
- Move electronics, artwork, and upholstered furniture out of the affected room.
- If water pools in a sagging ceiling, do not puncture it yourself, call a professional. A ceiling can hold dozens of gallons and release suddenly.
Then start the claim
Once safety and containment are handled:
- Contact your insurer. Report the damage, get a claim number, and ask about next steps and deadlines.
- Call a professional roofer. A licensed contractor can safely tarp, inspect, and document the damage for your claim.
- Keep records. Save all photos, notes, and receipts in one folder, labeled by date.
When to Call a Professional Roofer for a Storm Damage Assessment
Call a professional roofer any time you see damage you can't fully assess from the ground: missing shingles, damaged flashing, interior water spots, or anything structural.
A professional assessment catches hidden problems. Attic leaks, damaged decking, and compromised flashing often aren't visible from your yard.
At Certified Roofing Solutions Inc., we inspect both residential and commercial roofs across the area.
Conclusion: Protecting Your Home After the Storm
Storm damage rarely fixes itself. A lifted shingle or cracked vent seal becomes leaks, mold, and costly repairs if you wait.
If you've spotted damage on your roof, don't put off the next step. Certified Roofing Solutions Inc. offers expert inspections, top-quality repairs, and full support with insurance claims. Our experienced team tailors every job to your home and is committed to excellence.
Frequently Asked Questions
How can I inspect my roof safely without climbing onto it?
Stay on the ground and use binoculars to scan your roof. Look for missing, cracked, or curling shingles, damaged flashing around chimneys and vents, and dents from hail. Check gutters and downspouts for shingle granules. Walk the perimeter of your home to spot debris, fallen branches, and damaged roofing materials. Inspect your attic and ceilings for water spots or stains. This ground-level inspection is the safest way to identify potential issues before calling a professional.
What should I do if I find a roof leak after a storm?
If you find a leak, place a bucket under the drip and move furniture or valuables away from the area. If safe, use a tarp to temporarily cover the damaged section from the ground. Do not climb onto the roof. Take photos of the leak and any water damage for your insurance claim. Then, call a professional roofer immediately for emergency repairs. Quick action can prevent further water damage to your ceilings, walls, and attic.
What photos should I take to document storm damage?
Take wide shots of your entire roof and close-ups of specific damage like missing shingles, dented flashing, or cracked vents. Photograph any debris on the ground, including fallen branches or shingle pieces. Capture water stains on ceilings and walls inside your home. Include a date stamp if possible. These photos will be crucial for your insurance claim and help a professional roofer assess the damage quickly.
Should I call a roofing contractor or my insurance company first?
Call a professional roofing contractor first. They can safely inspect your roof, document the damage, and provide an assessment. This documentation will support your insurance claim. Most insurance policies require you to report damage promptly, so contact your insurer soon after. A reputable roofer can help you understand the claims process and ensure nothing is missed. Certified Roofing Solutions Inc. can provide expert assistance with your roofing needs.
When a storm leaves its mark on your roof, you need a team that catches what others miss. Certified Roofing Solutions Inc. brings experienced professionals, tailored solutions, and top-quality workmanship to every project, from emergency repairs to full replacements. Get started with Certified Roofing Solutions Inc. and protect your home with roofing you can trust. Book an Appointment Today.