 how-to
How to Maintain Commercial TPO Roofing Systems
Table of Contents
- Why Routine TPO Roof Maintenance Matters
- TPO Roof Inspection: Establishing Your Program
- Creating a Commercial TPO Roof Maintenance Checklist
- How to Clean a TPO Roof Safely and Effectively
- Addressing TPO Roof Seam Repair and Damage
- Seasonal Maintenance Schedule and Weather-Triggered Tasks
- Safety Procedures and When to Call a Professional
- Documentation, Warranty, and Maintenance Records
- Frequently Asked Questions
Last Updated: October 10, 2026
Why Routine TPO Roof Maintenance Matters
To maintain commercial TPO roofing systems properly isn't optional, it's essential to protecting your investment and avoiding costly emergency repairs. A thermoplastic polyolefin membrane is engineered to last 20-30 years, but only when you follow a consistent maintenance program. Without it, small problems become big ones fast.
Debris buildup causes water intrusion that damages insulation and structural components. Routine maintenance catches issues early, saving tens of thousands in repair costs.
TPO Roof Inspection: Establishing Your Program
Start with a baseline inspection by a qualified roofing contractor. Document membrane condition, seam locations, penetrations, drainage patterns, and existing damage. This reference point guides all future inspections.
Schedule inspections at least twice per year (spring and fall), plus after severe storms or high winds. Use ground-level visual inspections with binoculars for routine checks; reserve full roof inspections for seasonal reviews and post-storm assessments.
Document every inspection. Photograph areas of concern. Record dates, findings, and any repairs completed. This documentation becomes critical for warranty claims and demonstrates due diligence if issues arise later.
Creating a Commercial TPO Roof Maintenance Checklist
A maintenance checklist with clear pass/fail criteria and measurable thresholds ensures consistency and tells you when to act.
Visual Inspection Points with Pass/Fail Criteria
Walk the roof systematically and evaluate each item against these standards:
Membrane Surface Condition
- PASS: Smooth, uniform color, no visible blisters, wrinkles, or lifted areas
- FAIL/MONITOR: Blisters under 3 inches with no growth = monitor quarterly. Blisters over 3 inches or growing = call contractor within 2 weeks. Wrinkles or lifted membrane = call immediately
Seams and Heat-Welded Joints
- PASS: Seams appear continuous with no visible gaps or separation
- FAIL/MONITOR: Hairline separation under 1/8 inch = inspect within 30 days. Separation over 1/8 inch or water seeping = emergency repair within 48 hours
Flashing Around Penetrations
- PASS: Flashing is sealed and shows no separation from the membrane
- FAIL/MONITOR: Minor sealant cracking or separation under 1/4 inch = repair within 60 days. Separation over 1/4 inch or water staining = call contractor within 1 week
Roof Edges and Curbs
- PASS: Edge trim is secure with no gaps between trim and membrane
- FAIL/MONITOR: Loose fasteners or minor gaps under 1/8 inch = tighten within 30 days. Gaps over 1/8 inch = call contractor within 2 weeks
Foot Traffic Patterns and Wear
- PASS: No visible accelerated wear in traffic zones
- FAIL/MONITOR: Visible thinning or discoloration = evaluate traffic patterns and consider walkway pads. Call contractor within 60 days
Surface Discoloration or Staining
- PASS: Uniform color with no unexplained stains
- FAIL/MONITOR: Light staining = monitor. Dark staining or water rings = investigate within 2 weeks
Drainage and Ponding Assessment with Quantifiable Standards
Water pooling on a TPO roof accelerates degradation. Use these measurable criteria:
Roof Drains
- PASS: Water drains completely within 24 hours. No debris in drain opening
- FAIL/MONITOR: Water takes 24-48 hours to drain = clean and retest. Water standing over 48 hours = call contractor
Gutters and Downspouts
- PASS: Clear of debris, water flows freely
- FAIL/MONITOR: Debris present = clean immediately. Overflow during rain = clean and inspect for blockage
Ponding Water
- PASS: No water standing 48 hours after rain
- FAIL/MONITOR: Water standing 48-72 hours = plan for grading or drain addition. Water over 72 hours = emergency
Rooftop Equipment and Service Areas
HVAC Units, Condenser Pads, and Equipment Curbs
- PASS: Equipment is secure, no movement, flashing sealed and intact
- FAIL/MONITOR: Loose bolts = tighten within 30 days. Flashing separation or water staining = call contractor within 1 week
Rooftop Access Points and Ladders
- PASS: Ladders and access equipment are secure, no rust, railings intact
- FAIL/MONITOR: Minor rust = treat and monitor. Loose bolts = repair within 30 days. Unsafe access = repair immediately
Documentation Protocol
For each inspection, record:
- Inspection date and time
- Weather conditions (temperature, recent rain, wind)
- Inspector name and credentials
- Specific findings for each checklist item (PASS, MONITOR, or FAIL)
- Measurements and photos of any issues
- Recommended actions and timeline
- Contractor contact information if professional repair is needed
Use a standardized form or digital tool to create a searchable maintenance history that reveals patterns over time.
How to Clean a TPO Roof Safely and Effectively
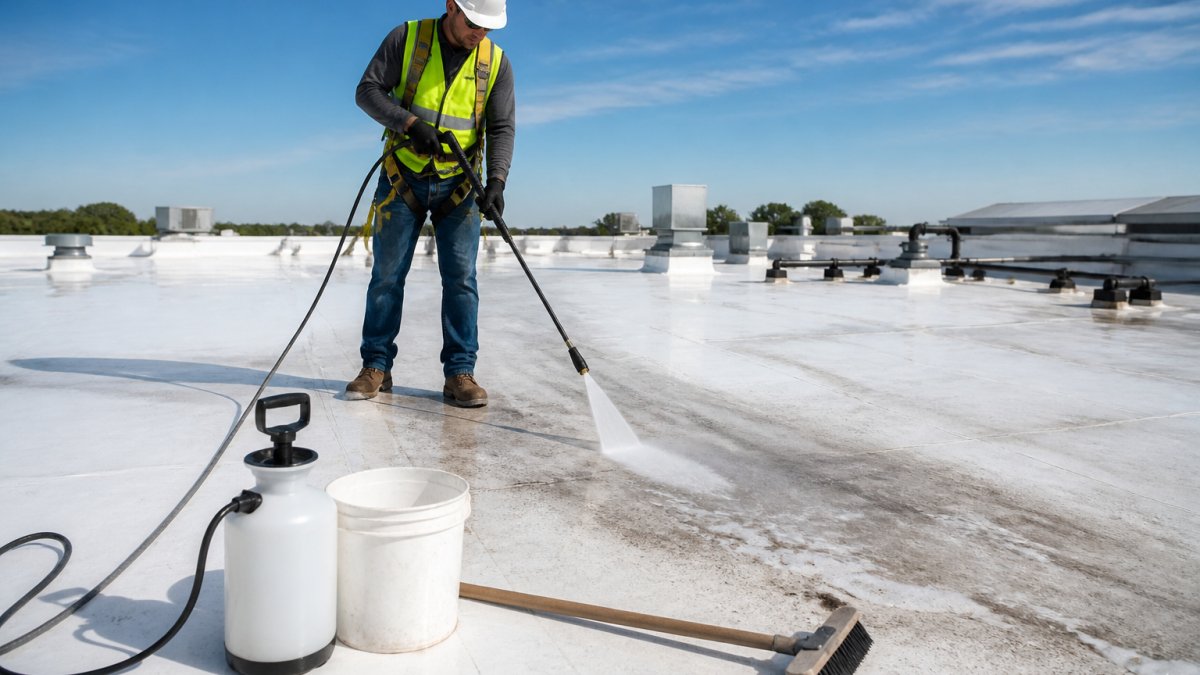
Use low-pressure washing only (50-80 PSI maximum) to avoid damaging seams. Use manufacturer-approved cleaning products or plain water with a soft-bristle brush. Remove debris systematically from high points downward using a soft brush or leaf blower; use plastic scrapers only, never metal. Clean roof drains and gutters thoroughly and flush drains with water. Minimize roof traffic to inspection and maintenance only.
Addressing TPO Roof Seam Repair and Damage
Seams are the most vulnerable part of a TPO roofing system. Inspect for separation, gaps, or weak welds. Small issues can be sealed with TPO-compatible sealant; larger separations require professional re-welding. Call a qualified contractor for anything beyond minor sealant application.
Seasonal Maintenance Schedule and Weather-Triggered Tasks
Plan maintenance around seasonal weather patterns and respond promptly to weather events. A structured seasonal schedule prevents reactive emergency repairs.
Spring Maintenance (March-May)
Primary Goals: Assess winter damage, clear debris, prepare for summer storms
Tasks:
- Full roof inspection: Within 2 weeks of the last freeze-thaw cycle, document damage with photos
- Gutter and drain cleaning: Remove debris and flush drains. Inspect flashing for ice dam damage
- Seams and flashing: Check for separation or gaps, especially in ice dam areas
- Membrane surface: Look for blisters or wrinkles from freeze-thaw cycles
- Equipment check: Verify HVAC units and equipment remained secure
- Schedule repairs: Address damage before summer storm season
Summer Maintenance (June-August)
Primary Goals: Monitor for storm damage, manage heat stress, maintain drainage
Tasks:
- Post-storm inspections: Within 48 hours of severe storms, hail, or high winds, document damage with photos
- Hail damage assessment: After hail, inspect entire roof for punctures using a flashlight
- Drainage monitoring: Check drains flow freely during heavy rain
- Heat-related issues: Check for growing blisters, wrinkles, or softening sealant
- Quarterly visual check: Inspect from ground every 4 weeks
- Equipment service coordination: Require contractors to report flashing or membrane damage
Fall Maintenance (September-November)
Primary Goals: Clear debris, prepare drainage, address damage before cold weather
Tasks:
- Leaf and debris removal: Remove debris twice during fall (mid-September and mid-October)
- Drain and gutter cleaning: Ensure drains are completely clear before winter
- Seam and flashing inspection: Check before winter; cold weather worsens existing separation
- Ponding water assessment: Correct drainage problems before winter
- Roof edge and curb check: Verify trim is secure and fasteners are tight
- Equipment winterization: Ensure equipment is secure and flashing is sealed
- Schedule winter repairs: Complete repairs before winter arrives
Winter Maintenance (December-February)
Primary Goals: Minimize roof access, monitor from distance, respond to emergencies
Tasks:
- Avoid unnecessary roof access: Limit to emergency repairs only
- Ground-level visual checks: Use binoculars to look for damage, snow/ice buildup, or icicles
- Monitor for ice dams: Watch for icicles or water staining indicating water backing up
- Post-storm inspection: Inspect after 24-48 hours when safe
- Interior water intrusion checks: Check for water staining indicating flashing failure
- Equipment monitoring: Verify equipment remains secure from the ground
- Spring preparation: Plan spring inspection and schedule repairs
Weather-Triggered Inspection Protocol
Beyond seasonal schedules, respond to specific weather events:
Severe Thunderstorms (Wind Gusts Over 40 mph)
- Inspect within 48 hours
- Look for: Lifted or separated membrane, loose flashing, debris damage, seam separation
- Document with photos and measurements
Hail Events
- Inspect within 24 hours
- Look for: Small punctures or dents in membrane, damage to flashing, damage to rooftop equipment
- Use a flashlight to inspect seams and penetrations closely
- Hail damage may not be immediately obvious; a second inspection 1-2 weeks later can reveal damage that develops as the membrane settles
Heavy Rain (Over 1 inch in 24 hours)
- Inspect within 24 hours
- Look for: Ponding water, drainage blockages, water intrusion signs inside the building
- Check all drains and gutters
Freeze-Thaw Cycles (Temperature Swings Over 30°F)
- Inspect within 48 hours of the thaw
- Look for: Seam separation, blisters, flashing separation, ice dam damage
- Freeze-thaw stress is cumulative; multiple cycles in a season warrant extra attention
Extreme Heat (Sustained Temperatures Over 95°F)
- Inspect within 1 week
- Look for: Blisters expanding, wrinkles developing, sealant softening or pulling away
- Heat accelerates existing problems
High Winds (Sustained Over 35 mph or Gusts Over 50 mph)
- Inspect within 48 hours
- Look for: Lifted membrane, loose flashing, equipment shifting, seam separation
- Wind can move rooftop equipment; verify it remains secure on its pad
Sample Annual Maintenance Calendar
January-February: Ground-level visual checks (binoculars), monitor for ice dams, plan spring inspection
March: Full roof inspection, gutter/drain cleaning, ice dam damage assessment, schedule repairs
April-May: Complete spring repairs, post-storm inspections as needed, quarterly visual check
June: Post-storm inspections (summer storm season), hail damage assessment, drainage monitoring
July: Quarterly visual check, equipment service coordination, heat stress monitoring
August: Post-storm inspections, quarterly visual check, prepare for fall maintenance
September: Leaf and debris removal, drain cleaning, seam/flashing inspection, schedule winter repairs
November: Final fall inspection, winterization of equipment, prepare for winter
December: Ground-level checks only, monitor for ice dams, document any damage
Documentation of Weather Events
Maintain a log of significant weather events and corresponding roof inspections:
- Date of weather event
- Type of event (storm, hail, freeze-thaw, extreme heat, wind)
- Severity (wind speed, hail size, temperature range, rainfall amount)
- Inspection date and findings
- Photos and measurements of any damage
- Repairs completed and contractor information
- Insurance claims filed (if applicable)
Safety Procedures and When to Call a Professional
Commercial roof access carries serious risks. Falls are the leading cause of serious workplace injuries. Never access your roof without proper safety measures.
Safety essentials:
- Use a fall protection system rated for your roof height
- Wear non-slip footwear with good traction
- Never work alone on a roof
- Avoid roof access during wet, icy, or windy conditions
- Use proper ladders and access equipment
- Wear high-visibility clothing
Call a professional roofing contractor when:
- You discover seam separation or significant damage
- Blisters or wrinkles are growing or spreading
- Water intrusion is occurring inside the building
- Flashing is damaged or separated
- Drainage problems persist despite cleaning
- You're unsure whether damage requires repair
- You need major repairs or re-welding work
Our team understands TPO-specific maintenance requirements and can quickly identify issues that need professional attention.
Documentation, Warranty, and Maintenance Records
Your maintenance records are your proof of due diligence. They're also essential for warranty coverage and insurance claims.
Keep detailed records of inspection dates, findings, photos, repairs, cleaning, and weather events. Store records digitally and in hard copy. Review your TPO warranty, most require documented maintenance to remain valid. Your maintenance records prove compliance and are essential for warranty coverage and insurance claims.
Maintaining your commercial TPO roofing system protects your building and your bottom line. Regular inspections, proper cleaning, and prompt attention to damage prevent small problems from becoming expensive failures. At Certified Roofing Solutions Inc., we recommend scheduling your first professional inspection today. Our team will help you avoid costly emergency repairs.
Frequently Asked Questions
How often should a commercial TPO roof be inspected?
Commercial TPO roofs should be inspected at least twice per year, typically in spring and fall. Additional inspections are critical after severe weather events, including high winds, hail, or heavy storms. Many property managers schedule inspections quarterly to catch issues early. Document all inspections with photos and notes to maintain warranty compliance and support insurance claims if damage occurs.
What maintenance does a TPO roof require?
TPO roof maintenance includes regular debris removal, drainage system cleaning, membrane inspection for tears or blisters, seam checks, and low-pressure cleaning. Inspect flashing around HVAC units and roof penetrations monthly. Remove standing water promptly to prevent ponding damage. Use only manufacturer-approved cleaning products and methods. Schedule professional inspections twice yearly and address any visible damage immediately to extend the roof's service life.
Can building staff perform routine TPO roof maintenance?
Building staff can handle basic tasks like removing leaves and debris, checking drains, and documenting visible damage. However, roof access requires proper safety equipment and fall protection training. Seam repairs, membrane cleaning with specialized products, and structural assessments should be left to qualified roofing contractors. Staff should never use pressure washers or harsh chemicals on the TPO membrane, as these can cause permanent damage.
What should I do if I find damage during a TPO roof inspection?
Document the damage with photos and measurements, then contact a qualified roofing contractor for assessment. Small punctures or tears under 6 inches can often be patched with manufacturer-approved sealant or repair kits. Larger damage, multiple blisters, or seam separation requires professional repair to prevent water intrusion. Address damage promptly to avoid costly interior water damage and maintain warranty coverage.