 how-to
Preventing Leaks in Standing Seam Metal Roofs
Table of Contents
- Why Standing Seam Metal Roofs Leak (and How to Spot It Early)
- Your Metal Roof Inspection Checklist: What to Look For
- Standing Seam Roof Maintenance: A Seasonal Prevention Schedule
- Metal Roof Flashing Leak Prevention: Sealing the Weak Points
- Standing Seam Metal Roof Leak Repair: Step-by-Step
- When to Call a Professional for Leak Repair
- Frequently Asked Questions
Last Updated: October 12, 2026
Why Standing Seam Metal Roofs Leak (and How to Spot It Early)
Preventing leaks in standing seam metal roofs starts with one fact: the panels rarely fail. The leaks come from the details around them.
Standing seam metal roofs are among the most durable systems you can buy. Panels lock together with raised seams and no exposed fasteners punch through the surface, so the design sheds water for decades.
But durable is not maintenance-free. Every metal roofing system has weak points, and water finds them.
Common Causes of Leaks in Metal Roofs
Most metal roof leaks trace back to a short list of causes:
- Failed sealant at seams, edges, or penetrations
- Loose or backed-out fasteners on trim and flashing
- Damaged panels from hail, fallen limbs, or foot traffic
The last two are the ones homeowners miss. Water intrusion starts small and shows up far from the breach.
Standing Seam Roof Leak-Prone Areas
Leaks in standing seam metal roofs cluster in predictable spots. Check these first:
- Panel seams, especially where panels meet at hips and valleys
- Cornice flashing and roof edges
- Roof penetrations like vents, chimneys, and pipe boots
A common mistake is assuming a ceiling stain sits under the leak. Water travels along the underside of panels before it drips, so the entry point can be several feet uphill.
Your Metal Roof Inspection Checklist: What to Look For
A metal roof inspection checklist should cover seams, flashing, penetrations, fasteners, and panel condition, but on a standing seam roof the point is to figure out which of four failure modes you are looking at, because each has a different fix.
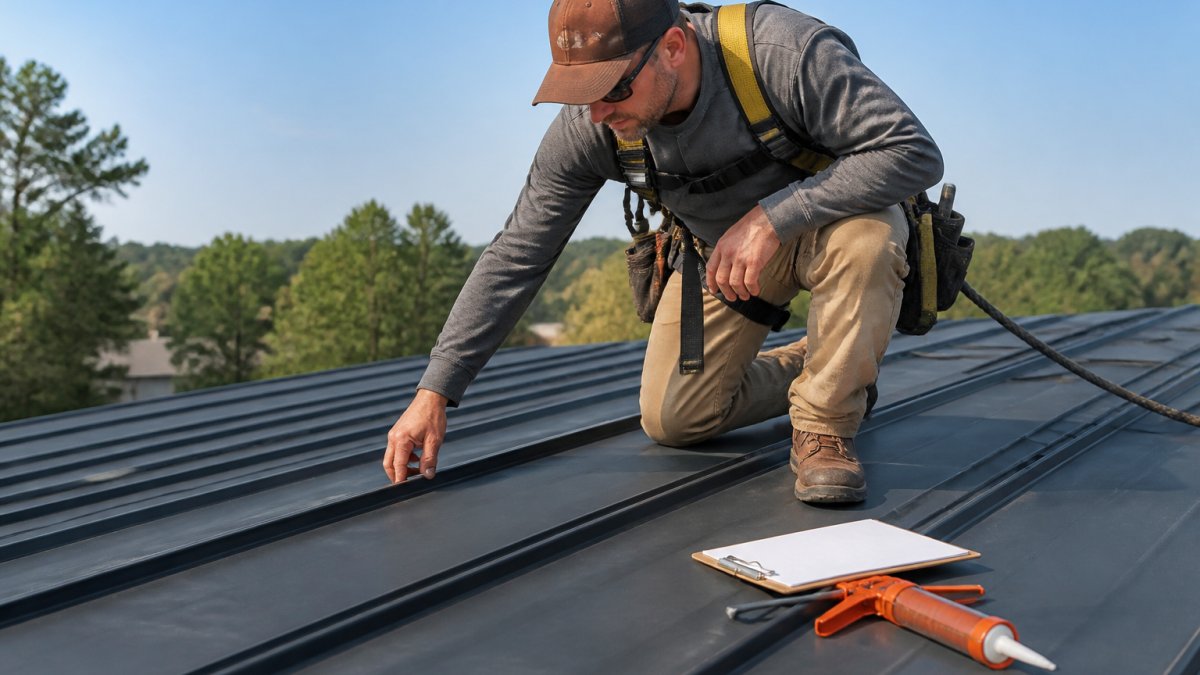
Step 1: Diagnose the leak type before you climb
Standing seam leaks fall into four buckets. Identify the bucket first, or you will seal the wrong thing.
- Seam leaks show up as rust trails or staining running downhill from a raised seam. The panel lock itself has opened, or the factory-applied sealant inside the seam has failed.
- Flashing leaks appear at edges, walls, chimneys, valleys, and penetrations. Look for cracked or pulled-away sealant, lifted counterflashing, or a gap where two materials meet.
- Fastener leaks show up as a ring of rust or a dark stain around a screw head on trim, ridge caps, or panel ends. The neoprene washer under the head has dried out or the fastener has backed out.
If the stain is a single narrow trail, suspect seam or flashing. If it is a ring, suspect a fastener. If it is broad and diffuse, suspect condensation.
Step 2: Inspect safely, or do not inspect at all
Standing seam panels are slick when dry and dangerous when wet, and the raised seams give you nothing to grip. A fall from a 6:12 pitch is life-changing.
- Work from the ground with binoculars first. You can spot lifted seams, dented panels, rust trails, and displaced ridge caps from the yard.
- If you must go up, use a roof anchor rated for fall arrest, a full-body harness, and a shock-absorbing lanyard. Roof jacks and toe boards are not fall protection.
- Wear soft-soled shoes. Hard and smooth soles both slide on painted metal.
- Never walk a wet, frosty, or dusty panel, or one you just cleaned with a solvent.
If you do not own fall-arrest gear and know how to rig it, the correct inspection is a ground inspection plus an attic inspection. That is the procedure, not a compromise.
Step 3: The standing-seam inspection checklist
- Scan the roof from the ground with binoculars for lifted seams, oil-canning, or dents
- Check the attic for water stains, damp insulation, daylight, or condensation on the underside of the deck
- Look at every seam for gaps, popped factory sealant, or rust trails, and follow any trail uphill to its source
- Inspect flashing at walls, chimneys, valleys, and roof edges for cracked sealant or lifted metal
Step 4: Read the clues correctly
Two diagnostic habits separate a real inspection from a walk-around:
Follow rust trails uphill. Water carries metal particles downhill from the entry point, so the stain is downstream of the leak. Trace the trail to where it starts, that is your breach.
Do not trust the ceiling stain. Water travels along the underside of panels and purlins before it drips. A stain mid-room can come from a penetration 15 feet uphill and two bays over. Match the attic-side wet spot to the roof-side entry point before you touch a caulk gun.
Inspecting Seams and Roof Panels
Start at the seams, the raised joints where two panels lock together (single lock, double lock, or snap lock, depending on profile).
Rust trails are a tell: water is getting in above and carrying metal particles down the panel.
Check panel edges too. Wind can lift an edge and break the seal underneath, and water intrusion is then only a matter of time.
Checking Flashing and Roof Penetrations
Flashing is the metal that seals roof edges, walls, and penetrations. It is the most common leak point on any roofing system, not just metal.
Look closely at:
- Cornice flashing along the roof edge
- Step flashing where the roof meets a wall
- Chimney flashing and counterflashing
- Pipe boots and vent seals
Sealant around these areas dries out and cracks over time, giving rainwater a direct path inside.
Standing Seam Roof Maintenance: A Seasonal Prevention Schedule
Standing seam roof maintenance works best on a schedule. Two inspections a year plus a post-storm check keeps small issues from becoming expensive repairs.
| Season | Task | Why It Matters |
|---|---|---|
| Spring | Inspect seams and flashing after winter | Freeze-thaw cycles loosen sealant |
| Spring | Clear gutters and downspouts | Clogs push water under roof edges |
| Summer | Check for thermal movement damage | Heat expands panels and stresses clips |
| Fall | Re-check penetrations and boots | Prepare for winter weather |
| Fall | Clear debris from roof surface | Leaves trap moisture against panels |
| After storms | Full inspection of panels and seams | Catch hail and wind damage early |
This schedule takes a few hours a year and prevents damage that costs far more to fix.
Thermal Movement and Clip Design
Metal expands and contracts with temperature changes, panels grow on a hot day and shrink back on a cold night.
The clips holding panels to the deck allow this movement. Fixed clips hold one point steady; floating clips let the panel slide as it expands and contracts.
When clips are installed wrong, or too many panels are locked in place, thermal movement has nowhere to go.
This is one of the hardest to spot without training.
Metal Roof Flashing Leak Prevention: Sealing the Weak Points
Metal roof flashing leak prevention comes down to two things: using the right sealant and reapplying it before it fails. Sealant has a service life. It dries, cracks, and pulls away from metal over time.
Plan to inspect sealant at every flashing and penetration once a year. Touch up any spot that looks chalky, cracked, or separated.
Choosing Sealants and Roofing Materials
Not all sealants work on metal roofs. Some break down fast under UV exposure. Others do not bond well to metal.
For seam sealing and flashing, look for:
- Silicone caulk rated for roofing and UV exposure
- Urethane sealants for high-movement areas
- Butyl tape for sealing under flashing and trim
- Roofing cement for temporary patching only
Silicone caulk is the go-to for most metal roof seam caulking. It stays flexible and handles UV well. Urethane is better where panels move a lot.
On repair-material compatibility: never mix sealant types on the same seam. New silicone over old urethane may not bond. Clean the old sealant out first, then apply fresh material.
Standing Seam Metal Roof Leak Repair: Step-by-Step
Standing seam metal roof leak repair follows a clear process. Find the source, clean the area, and seal it correctly. Rushing any step means the leak comes back.
Total Time: 1-3 hours for a small leak Difficulty: Moderate
What You'll Need
- Soft-soled shoes and a safety harness
- Roof-rated silicone caulk or urethane sealant
- Caulk gun
- Wire brush and clean rags
Repairing Small Leaks and Reinforcing Seams
Step 2: Clean the area. Scrub the seam or flashing with a wire brush.
Step 3: Dry the surface. Water trapped under new sealant causes it to fail.
Step 6: Replace bad fasteners. Swap loose or rusted screws for new ones with neoprene washers.
Expected Result: A sealed, watertight repair that holds through the next storm season.
For larger damage, patching may not be enough. A damaged panel usually needs replacement, not sealant.
When to Call a Professional for Leak Repair
Call a professional when the leak source is unclear, panels are damaged, or the repair involves heights and safety gear you do not have.
Signs it is time to call in help:
- Water is coming through in multiple spots
- A panel is dented, lifted, or punctured
- The leak returns after you seal it
- You cannot safely get on the roof
Warranty matters here.
Professional repair also means the job gets done right the first time. A trained eye catches hidden damage a homeowner would miss, saving money later.
At Certified Roofing Solutions Inc., our team handles residential and commercial roofing across Marietta, Alpharetta, Dunwoody, and Johns Creek.
Frequently Asked Questions
How often should a standing seam metal roof be inspected?
Plan on a professional inspection once a year, plus another after any major storm. Homeowners can do a visual check from the ground each season, looking for loose seams, bent panels, or debris. If you notice water stains on ceilings or attic rafters, schedule an inspection right away. Regular checks catch small issues before they become expensive repairs, especially in areas prone to hail or high winds.
Can you use roof sealant on a standing seam metal roof?
Yes, but only sealants made for metal roofing, such as silicone caulk or polyurethane-based products. Avoid roofing cement, which can trap moisture and fail as panels expand and contract. Apply sealant to clean, dry surfaces and focus on flashing edges, fastener heads, and penetrations rather than the standing seams themselves. For seam repairs, a trained roofer may use a seam sealant or butyl tape designed for the specific panel profile.
What are the most common causes of standing seam roof leaks?
Leaks usually trace back to flashing failures, loose fasteners, damaged panels, or deteriorated sealant at penetrations like vents and chimneys. Thermal movement can also work fasteners loose over time, and improper installation (such as missing clips or poorly sealed end laps) creates weak points. Debris buildup and clogged gutters can force water under panels. A thorough inspection often reveals the culprit at a seam, edge, or penetration.
When should a standing seam metal roof leak be repaired by a professional?
Call a professional if the leak is at a seam, if you see multiple leaks, or if the roof has widespread corrosion or loose panels. DIY sealing may work for a small flashing gap, but standing seam repairs require specific tools and knowledge of clip systems. A licensed roofer can diagnose hidden water intrusion, check attic insulation, and make repairs that maintain your warranty. If you're unsure of the source, professional diagnosis saves time and money.
A small leak today can mean rotted decking, stained ceilings, and mold tomorrow. The longer water sits, the more it costs to fix.
Certified Roofing Solutions Inc. brings an experienced team, tailored repair plans, and a commitment to getting the details right. We serve homeowners and commercial property managers across the area with top-quality roofing services. Book an appointment today and protect your property before the next storm finds the weak spot.