 How-to
How Do You Fix Attic Condensation in Winter?
Last Updated: October 29, 2026
Quick Summary
To fix attic condensation in winter, find where the moisture comes from before spending money on repairs. Seal air leaks at the attic floor plane, keep indoor relative humidity between 30% and 40%, and balance soffit intake with exhaust vents. Air sealing is the highest-value fix for attic condensation.
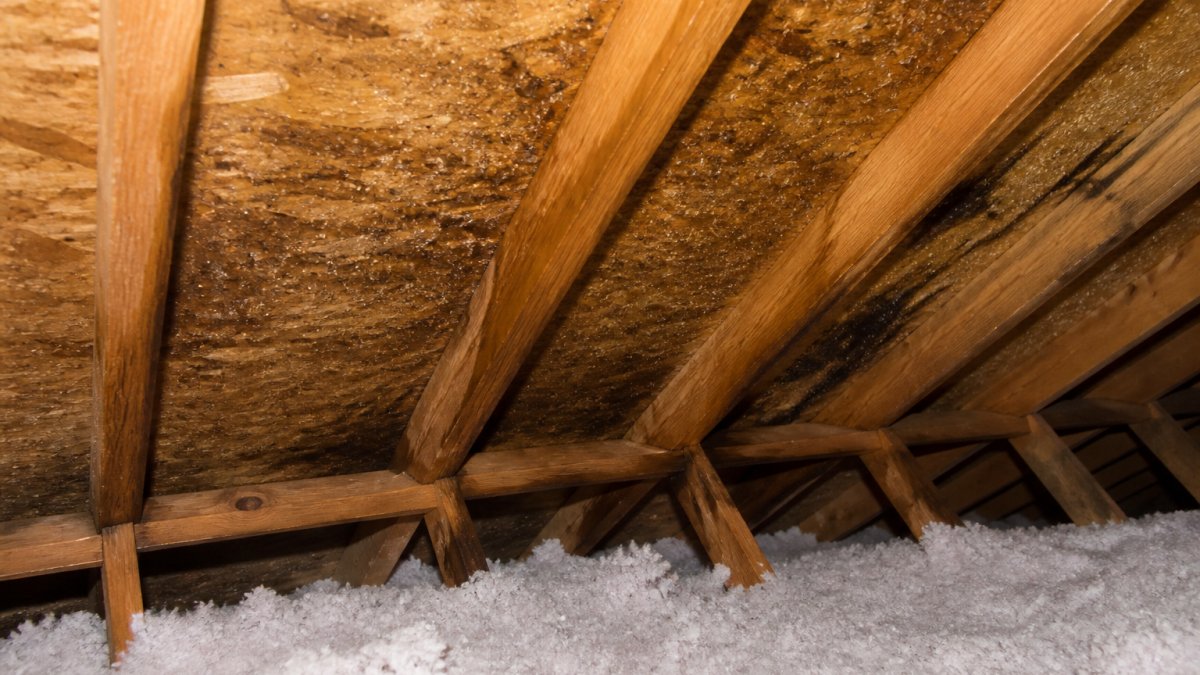
- Check the roof sheathing for frost, droplets, or dark streaks on a cold morning.
- A roof leak worsens after rain, while condensation appears on cold, clear days.
- A 1,500 sq ft attic at 1:150 needs 10 sq ft of NFVA, split evenly intake and exhaust.
- Run bathroom and kitchen exhaust fans for 15 to 20 minutes after use.
- Never seal soffit vents to stop cold air, which traps moisture and accelerates mold.
Table of Contents
- Start With a Safe, Step-by-Step Diagnosis
- The Most Common Attic Condensation Causes in Winter
- Roof Leak vs Condensation: How to Tell the Difference
- Attic Air Sealing: Stop Warm Air Before It Reaches the Roof Deck
- How to Improve Attic Ventilation and Verify Airflow
- Set Indoor Humidity Targets and Measure Moisture
- Repair Sequencing: DIY vs Professional Fixes for Attic Condensation
- Book an Attic and Roof Inspection to Confirm the Fix
- Frequently Asked Questions
Start With a Safe, Step-by-Step Diagnosis
Attic condensation is moisture that forms when warm, humid air meets a cold surface inside your attic. Fixing it starts with a diagnosis, not a repair.
Here is a safe order to follow:
- Pick a cold morning. Condensation shows up best when the roof deck is coldest.
- Suit up. Wear a mask, gloves, and eye protection. Never step on drywall between joists.
- Look up first. Check the roof sheathing for frost, droplets, or dark streaks.
- Look down. Inspect insulation for damp, matted, or compressed spots.
- Sniff the air. A musty smell points to moisture that has been there a while.
- Photograph everything. You will want the record for a contractor or insurance claim.
- Do not seal anything yet. You need the full picture first.
Watch out: never enter an attic with loose wiring, soft spots in the floor, or standing water. Call a professional instead.
The winter roof preparation checklist covers the seasonal steps that prevent these problems from returning.
The Most Common Attic Condensation Causes in Winter
Most winter attic moisture traces back to warm, humid indoor air leaking upward. Air sealing and insulation gaps let that air reach the cold roof deck, where it condenses.
The usual suspects:
- Air leaks around recessed lights, attic hatches, and plumbing penetrations
- Thin or compressed attic insulation that lets heat escape
- Bathroom exhaust fans venting into the attic instead of outdoors
Many homes have two or three of these at once. If you suspect moisture has already reached the insulation, check for signs of water damage in attic insulation before you add anything new.
Roof Leak vs Condensation: How to Tell the Difference
A roof leak shows up as a stain that grows after rain. Condensation shows up as frost or droplets on cold, dry days.
Here is how to separate them:
| Clue | Roof Leak | Condensation |
|---|---|---|
| Timing | Worse after rain or snow melt | Worse in cold, clear weather |
| Pattern | Localized stain, often near a penetration | Even frost or damp across the deck |
| Smell | Rarely musty at first | Often musty or mildewed |
| Insulation | Wet in one area | Damp or frosted near the cold edge |
A common mistake is patching a shingle when the real problem is indoor humidity. Storm-driven water can also mimic condensation, so review preventing water damage in attic after storms for the warning signs that point to a leak.
Attic Air Sealing: Stop Warm Air Before It Reaches the Roof Deck
Air sealing is the highest-value fix for attic condensation. Seal the gaps where warm indoor air escapes into the attic, and you remove the moisture source at its origin.
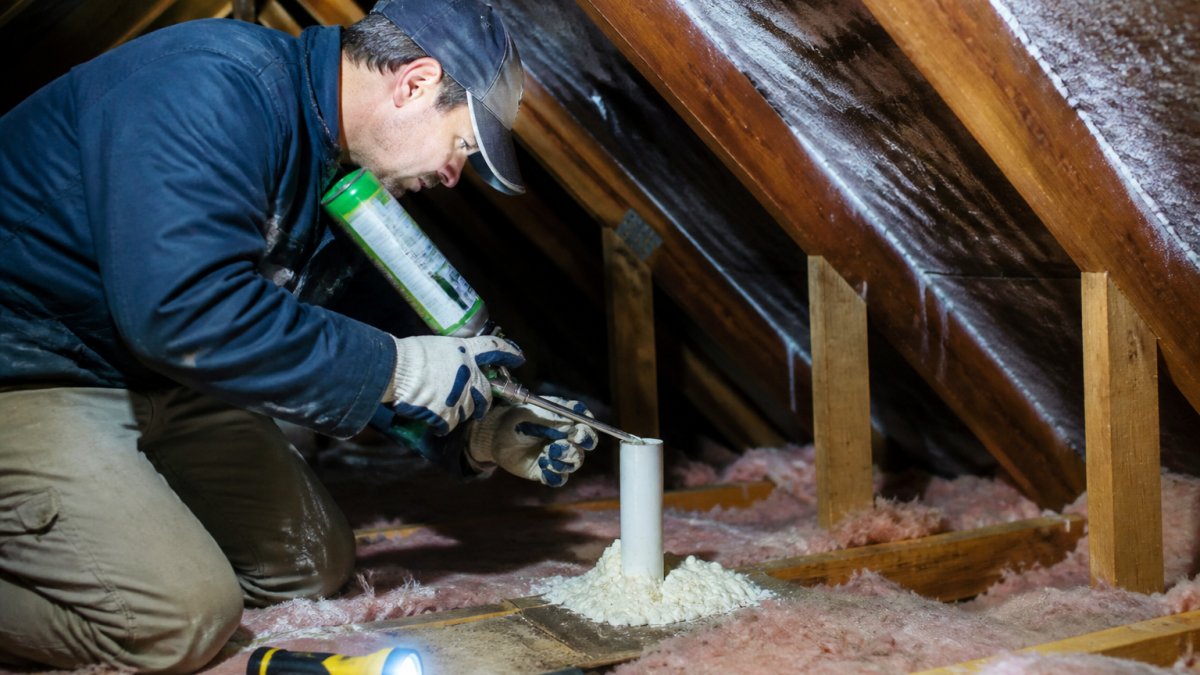
Start with the biggest offenders:
- Attic hatch and pull-down stairs (weatherstrip and insulate the cover)
- Recessed light fixtures (use covers rated for contact with insulation)
- Top plates where walls meet the ceiling
Watch out: sealing a gas appliance flue or combustion vent can create a carbon monoxide hazard. Leave those to a licensed professional.
How to Improve Attic Ventilation and Verify Airflow
Good attic ventilation is a balance, not a fan. Cold air enters low at the soffits, warms as it crosses the roof deck, and exits high at the ridge or gable vents. Most underperforming attics have plenty of exhaust and almost no working intake, which is why adding a powered fan often makes winter condensation worse: it depressurizes the attic, pulls conditioned air out of the living space, and drags more indoor moisture up with it.
Size the vents before you buy anything
Worked example: a 1,500 sq ft attic at 1:150 needs 10 sq ft of NFVA total, split 5 sq ft intake and 5 sq ft exhaust. Because NFVA is usually listed in square inches, that is 720 sq in intake and 720 sq in exhaust. A typical 4-inch continuous soffit vent strip provides roughly 9 sq in of NFVA per linear foot, so you would need about 80 linear feet of clear soffit vent, which is why blocked or insulation-stuffed eaves are so often the real culprit.
Verify airflow with tools, not guesswork
A tissue on a windy day is a start, but it is not a measurement. Three practical checks:
- Smoke test. Hold a stick of incense or a smoke pencil near a soffit vent on a calm, cold day. Smoke should be drawn steadily into the vent. If it hovers or blows back, intake is blocked or the attic is positively pressurized.
- Temperature split. Use an infrared thermometer or two cheap thermometers to compare soffit-edge air and ridge air on a cold morning. A working balanced system shows a measurable gradient from cold at the eaves to warmer at the ridge. No gradient suggests stagnant air.
- Pressure check. A handheld manometer or a borrowed blower-door test can show whether the attic is pressure-balanced with the house. A strongly negative attic pressure points to exhaust fans or duct leakage pulling conditioned air upward.
Clear the air path at the eaves
Insulation baffles (also called rafter vents or proper vents) keep the soffit-to-attic path open when insulation is blown in. Install them so they extend past the insulation depth and do not compress the vent. Then confirm the ridge vent is clear of debris, not painted shut, and not covered by a ridge cap installed over the vent slot. On older homes with gable vents only, check that both gables are open and screened, a single screened gable with the other closed is a common retrofit mistake.
A common mistake is adding a powered attic fan without fixing the intake. That pulls conditioned air out of the house and can make moisture worse. Ventilation balance matters more than raw fan power, and in most homes the fix is more intake, not more exhaust.
Set Indoor Humidity Targets and Measure Moisture
Indoor humidity is the number that drives winter attic condensation. In cold climates, keep indoor relative humidity between 30% and 40% during heating season. Above 40% in freezing weather, moisture starts condensing on cold surfaces.
Measure it with a cheap hygrometer placed in the living space, not the attic. Check it weekly. If it climbs, look for the cause:
- A whole-house humidifier running too high
- Long, steamy showers without a working exhaust fan
- Indoor laundry drying
Run bathroom and kitchen exhaust fans for 15 to 20 minutes after use. Fix any fan that vents into the attic. Small changes to daily habits often cut indoor humidity more than expensive equipment.
Repair Sequencing: DIY vs Professional Fixes for Attic Condensation
Sequence matters as much as the fix itself. Air sealing, insulation, and ventilation interact, so doing them out of order wastes money and can make moisture worse. The practical order is: diagnose, seal air leaks, control indoor humidity, balance ventilation, then upgrade insulation, and only then address structural repairs.
A diagnostic-first sequence
- Diagnose before spending. Confirm the moisture source (condensation vs leak) and map the air leaks. Photograph the roof deck, insulation, and any staining. This is the step most homeowners skip, and it is the one that determines whether the rest of the list is even correct.
- Air seal. Seal the attic floor plane, hatch, top plates, recessed lights, plumbing and wiring penetrations, and fan housings. This removes the moisture source at its origin and is the highest-impact step.
- Control indoor humidity. Lower the whole-house humidifier, run bath and kitchen fans for 15-20 minutes after use, and stop venting dryers or fans into the attic.
- Balance ventilation. Clear soffit intake, install baffles, and confirm the intake-to-exhaust ratio before adding any fan.
- Upgrade insulation. Only after air sealing, because insulation over a leaky ceiling traps moist air against the cold deck.
- Structural repairs. Replace wet insulation, repair sheathing, and treat mold last, once the source is controlled.
What is reasonable DIY
Caulking and spray-foaming accessible gaps, weatherstripping the attic hatch, installing insulation baffles, clearing soffit vents, lowering humidifier settings, and running exhaust fans are reasonable DIY jobs for a careful homeowner with basic tools and a mask. These are low-risk, high-return tasks.
What to hand off
Roof deck repairs, insulation replacement, and any work near gas appliances or combustion flues belong with a qualified professional. Sealing a gas appliance flue or combustion vent can create a carbon monoxide hazard. Roof access on steep or icy roofs is a fall risk that outweighs the savings.
When to stop and call a pro immediately
Escalate rather than continue DIY if you see any of the following:
- Mold covering more than a small patch, or any mold near HVAC equipment or living space
- Wet or collapsed insulation that has been damp for more than a season
- Soft or stained sheathing or sagging roof deck
If the fix requires opening the roof, compare options on our residential roofing repair service page before you commit. A professional inspection also documents what a contractor or insurer needs, and our guide to the benefits of professional roof inspection explains what a proper walkthrough includes.
Book an Attic and Roof Inspection to Confirm the Fix
Some moisture problems hide behind insulation and sheathing. An inspection confirms the source before you spend on repairs, and it catches damage a DIY check would miss.
A professional inspection can help identify the source of moisture before you spend on repairs.
Certified Roofing Solutions Inc. offers residential and commercial roofing services, including installations, repairs, and specialized roofing solutions tailored to each project. Contact us to book an appointment.
Frequently Asked Questions
What causes condensation in an attic during winter?
Warm, humid air from the living space rises into the attic and hits cold roof sheathing, where it condenses into water or frost. The usual drivers are air leakage through gaps around lights, hatches and ducts, plus weak ventilation and high indoor humidity from showers, cooking and whole-house humidifiers. Sealing those leaks and balancing intake and exhaust airflow removes the moisture source before it can damage the deck.
How can I tell if attic moisture is condensation or a roof leak?
Condensation usually shows up as uniform frost or dampness across the cold roof deck, often worst near the ridge and on north-facing slopes, and it dries when weather warms. A roof leak tends to stain a concentrated area, darken sheathing, and appear after rain regardless of temperature. Check after a dry cold snap versus after a storm; if moisture only follows rain, treat it as a roof leak and get it inspected.
Can poor attic ventilation cause condensation?
Yes. If soffit intake vents are blocked by insulation and exhaust vents are undersized, moist air lingers against the roof deck instead of escaping. Improving attic ventilation means keeping soffit vents clear, adding baffles, and confirming ridge or roof exhaust vents are open. A balanced system moves air from soffit to ridge continuously, which keeps the deck closer to outdoor temperature and reduces condensation.
Should I run a dehumidifier in my attic in winter?
A dehumidifier treats the symptom, not the cause. In most homes the moisture comes from air leaks and indoor humidity, so sealing gaps and lowering indoor humidity to roughly 30 to 50 percent does more than running a unit in a cold attic. Fix air sealing and ventilation first. If moisture persists after those steps, a roofing or insulation professional can confirm whether a dehumidifier or additional ventilation is warranted.
Winter attic condensation rarely fixes itself, and small moisture problems grow into insulation damage and mold fast. Certified Roofing Solutions Inc. brings an experienced team, tailored solutions, and a commitment to getting the diagnosis right the first time. Get started with Certified Roofing Solutions Inc. and book an appointment today to confirm the fix and protect your roof this winter.