 How-to
7 Warning Signs of Roof Flashing Damage to Spot Now
Last Updated: October 30, 2026
Quick Summary
To spot roof flashing damage, look for water stains on ceilings and walls near chimneys and skylights, drips during or after rain, and loose, lifted, or missing metal at roof penetrations. Check from the ground with binoculars, then in the attic for damp insulation and drip trails. Active drips or soft decking mean you should call a roofer now.
- Water stains near chimneys and skylights are the most common clue homeowners catch first.
- A drip that appears days after rain tells you water is traveling, making it harder to trace.
- Healthy flashing sits flat and tight with sealed edges and no rust or gaps.
- Stay on the ground during inspection; do not walk a wet, steep, or above-one-story roof without fall protection.
- Repair small gaps and cracked sealant, but replace flashing that is rusted through or repeatedly patched.
Table of Contents
- 7 Signs of Roof Flashing Damage You Can Spot Before It Spreads
- Water Stains on Ceilings and Walls
- Drips and Leaks During or After Rain
- Loose, Lifted, or Missing Flashing at Roof Penetrations
- How Roof Flashing Should Look When It Is Doing Its Job
- Your Roof Flashing Inspection Checklist: Ground to Attic
- Is It a Roof Flashing Leak or Another Roof Leak Source?
- When to Replace Roof Flashing vs. Repair It
- Book a Professional Roof Inspection Before the Next Storm
- Frequently Asked Questions
7 Signs of Roof Flashing Damage You Can Spot Before It Spreads
Learning how to spot roof flashing damage early can save you thousands in hidden repairs. A small flashing gap can quietly soak insulation for months before a homeowner notices a ceiling stain. Flashing is the thin metal that seals the seams where your roof meets chimneys, vents, skylights, and walls.
Roof flashing damage rarely announces itself. It hides behind shingles, inside attic corners, and under a fresh coat of paint. That's why the signs matter more than the leak itself.
Water Stains on Ceilings and Walls
Water stains are the most common clue homeowners catch first. Look for brown rings, yellow halos, or dark streaks on ceilings and upper walls. These marks mean water is already traveling through the decking.
Check near chimneys and skylights first. That's where most stains start. A stain that grows after heavy rain points straight at a flashing leak. Fresh paint over a stain will bubble again within weeks, so press on the spot and feel for softness.
Drips and Leaks During or After Rain
Drips during a storm are a flashing problem until proven otherwise. Water that shows up only in heavy rain, or hours after it stops, usually means it's pooling behind failed metal and finding a slow path inside.
Watch these spots:
- Ceiling corners near the chimney
- Around vent pipes in the attic
- Tops of upper-level windows
- Wall-to-roof intersections
A drip that appears days later tells you the water is traveling. That makes it harder to trace, and more urgent to check.
Loose, Lifted, or Missing Flashing at Roof Penetrations
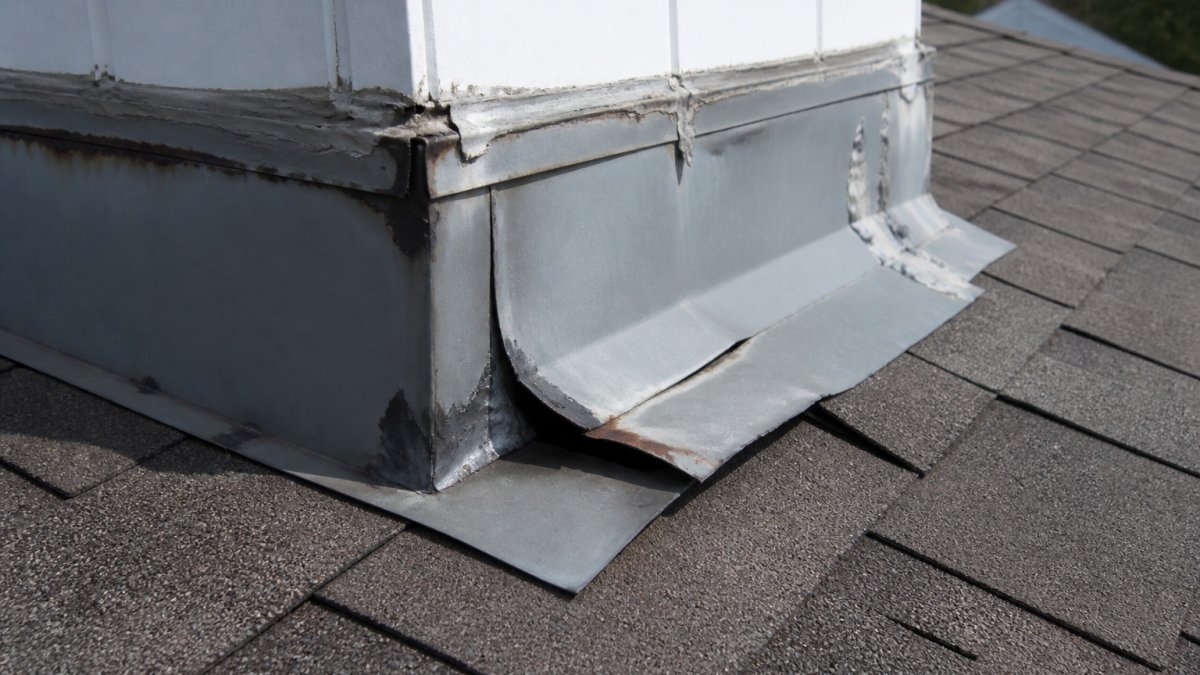
Loose flashing is a flashing failure waiting to happen. From the ground, scan every roof penetration: chimneys, vent pipes, skylights, and where roof sections meet walls. Look for metal that's lifted, bent, or gone.
Wind is the usual culprit. Once metal pulls away, sealant cracks and gaps open. Displaced flashing lets water straight into the decking.
Watch out: a missing piece of step flashing on a chimney is easy to overlook and often the exact cause of a slow attic leak.
How Roof Flashing Should Look When It Is Doing Its Job
Healthy flashing sits flat and tight against the surface. Edges are sealed, seams overlap in the downhill direction, and there's no daylight or gap underneath. It should look boring, honestly.
Here's the quick test:
- Flush contact: metal pressed to shingles and walls, no lifting
- Clean seams: no cracked or peeling sealant
- No rust: surface intact, no orange bloom or pitting
- Proper overlap: each piece laps over the one below
If your flashing looks loose, corroded, or patched with tar, it's time for a closer look. Tar patches are a red flag, not a fix.
Your Roof Flashing Inspection Checklist: Ground to Attic
A safe roof flashing inspection checklist keeps your feet on solid ground. You don't need to climb anything to catch most problems.
Step 1: Ground-Level Inspection With Binoculars
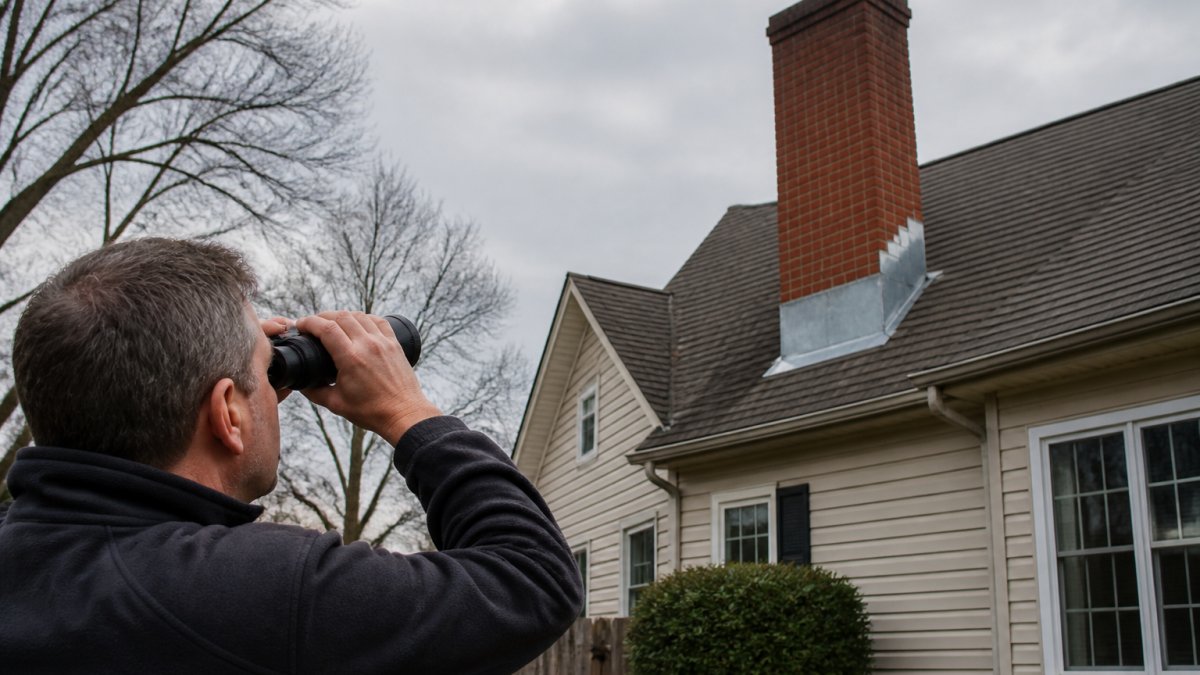
Start outside with binoculars and your phone camera. Walk the full perimeter and zoom in on every penetration. For a fuller walkthrough of safe self-inspection, see our guide on how to safely inspect a roof for damage.
Work in this order so you don't miss a penetration:
- Chimney: scan the step flashing along both sides and the apron at the base. Look for lifted metal, missing pieces, or tar smeared over seams.
- Vent pipes: check the rubber or metal boot at each pipe. Cracked collars and pulled nails are common.
- Skylights: inspect the curb flashing and the seal around the glass. Gaps at the corners are a frequent failure point.
- Wall-to-roof intersections: look for headwall and sidewall flashing that has pulled away or lost its counterflashing.
- Valleys and drip edges: check for rust, holes, or metal that has separated from the shingles.
Safety limits: stay on the ground. Do not walk a roof that is wet, steep, or above one story without fall protection and training. Binoculars and a zoom lens catch most visible defects; anything that requires hands-on inspection is a job for a professional.
Step 2: Safe Attic Check for Damp Insulation and Drip Trails
From inside, look up and around. Check for damp insulation, dark drip trails on rafters, and localized wet spots. If you see water-damaged insulation, our breakdown of signs of water damage in attic insulation shows exactly what it looks like.
Bring a flashlight and check these spots in order:
- Under each penetration: chimney, vent pipes, and skylight shafts are the first places to look for staining or drip marks.
- Rafter tails and decking: dark streaks running downhill from a penetration point to the stain below.
- Insulation: compressed, dark, or damp patches signal a slow leak that has been running for a while.
- Sheathing: soft spots or delamination around penetrations mean water has been sitting.
Step 3: Triage What You Found
Use this simple severity guide to decide how fast to act:
| What You See | Severity | Next Step |
|---|---|---|
| Minor surface rust, no gaps | Low | Monitor and recheck after the next storm |
| Cracked sealant, one loose section | Moderate | Schedule a professional inspection within a few weeks |
| Active drip, soft decking, or widespread attic moisture | High | Call a roofer now; limit attic access and document with photos |
When to Run This Checklist
Flashing problems often show up after specific weather events. A common pattern is to inspect after the first heavy rain of the season, after a windstorm that may have lifted metal, and after a freeze-thaw cycle that can open seams. Debris buildup at valleys and behind chimneys also traps moisture, so clear it before the rainy season and recheck the flashing underneath.
Is It a Roof Flashing Leak or Another Roof Leak Source?
A roof flashing leak has a tell: it shows up near a penetration, not in the open field of the roof. Stains near a chimney, vent, or skylight point to flashing. Stains in the middle of a ceiling often mean worn shingles or an ice dam instead. The trick is to read the pattern, not just the location.
Use this quick guide:
| Leak Location | Likely Source | What to Check |
|---|---|---|
| Near chimney or vent | Flashing failure | Lifted metal, cracked sealant |
| Around skylight | Flashing or glass seal | Gaps, rust, loose frame |
| Open ceiling field | Shingles or underlayment | Curling, missing tabs |
| Along walls | Step flashing | Missing pieces, gaps |
How Each Leak Source Behaves
- Flashing leaks tend to be localized and repeatable. Water enters at a seam, runs along the metal, and shows up as a stain or drip near the penetration. The stain often grows after wind-driven rain because the gap opens on the windward side.
- Shingle leaks usually appear in the open field of the ceiling, away from penetrations. Curling, missing tabs, or granule loss let water through the underlayment, and the stain often spreads over a wider area.
- Plumbing leaks show up near pipes inside the house, not at roof penetrations. A stain that appears regardless of rain, or that correlates with fixture use, points to plumbing rather than flashing.
- Condensation produces moisture on the underside of the decking or on cold surfaces, often in humid weather or after temperature swings. It tends to be diffuse rather than a single drip trail.
A Simple Diagnostic Sequence
- Map the stain. Note whether it is directly under a penetration or in the open field.
- Time the leak. Does it appear during rain, hours later, or independent of weather? Rain-timed leaks point to flashing or shingles; weather-independent leaks point to plumbing or condensation.
- Check the attic. A drip trail that starts at a penetration confirms flashing; moisture spread across the decking suggests condensation or a shingle leak.
- Look for wind correlation. A leak that only shows up in wind-driven rain is a strong flashing signal because the gap opens on one side.
Soft decking under a leak can mimic flashing trouble too. Our guide to early signs of roof decking water damage helps you rule that out before you blame the metal.
When to Replace Roof Flashing vs. Repair It
Repair makes sense when the metal is sound but the seal failed. Small gaps, cracked sealant, or one loose section are usually repairable. Replacement is the call when flashing is rusted through, cracked, or repeatedly patched.
Consider these factors:
- Age: old, corroded metal won't hold a seal
- Extent: one loose corner vs. an entire chimney run
- Repeat leaks: the same spot failing twice means replace
- Roof age: new flashing on a worn roof rarely pays off
If you're weighing a bigger decision, our guide on roof repair vs replacement gives you a clear framework.
Book a Professional Roof Inspection Before the Next Storm
Some flashing damage stays hidden until the next storm exposes it. A professional inspection can catch gaps, corrosion, and loose metal that are hard to see from the ground. A professional inspection can check penetrations, attic corners, and seams that are hard to see from the ground. Curious what a full inspection involves? See our guide to the benefits of professional roof inspection to understand what it covers and why it matters.
Frequently Asked Questions
What are the signs of damaged roof flashing?
Look for water stains on ceilings and walls, drips during or after rain, and flashing that is loose, lifted, displaced, or missing. Corrosion, rust, cracks, holes, and gaps in sealant are also warning signs. From the ground, use binoculars to check the chimney, vent pipes, skylights, roof edges, and wall intersections. Inside the attic, damp insulation, soft decking, and localized wet spots point to a flashing failure that needs a professional inspection.
Can damaged roof flashing cause a roof leak?
Yes. Flashing seals the joints where the roof meets chimneys, vent pipes, skylights, and walls, so any gap, crack, or lifted edge lets water intrusion start. A roof flashing leak often shows up first as a ceiling stain or a drip trail in the attic rather than a dramatic leak. Because the water travels along the roof decking, the stain can appear far from the actual failure point, which is why a professional inspection matters.
Can you inspect roof flashing from the ground?
You can catch a lot from the ground with binoculars. Look for loose, lifted, or displaced flashing, visible rust and corrosion, cracked sealant, and missing pieces around the chimney, vents, skylights, and roof edges. What you cannot see from the ground is the seal under the flashing or the condition of the roof decking. A professional inspection can check those hidden areas.
When should you call a roofer about damaged flashing?
Call a roofer as soon as you see water stains, active drips, or flashing that is loose, displaced, or missing. Small flashing repairs caught early usually cost far less than waiting for water damage to reach insulation, drywall, and framing. If your roof is older and you also see curling shingles or roof wear, ask for a full inspection so you know whether repair or replacement is the right call before the next heavy rain.
Storm season doesn't wait for a convenient moment. If you've spotted stains, drips, or loose metal, get ahead of it. Certified Roofing Solutions Inc. offers detailed inspections, honest repair recommendations, and full residential and commercial roofing services tailored to your property. Get started with Certified Roofing Solutions Inc. and book an appointment today to protect your roof before the next storm.