 How-to
Preventing Moisture Damage in Commercial Flat Roofs
Table of Contents
- Why Moisture Damage in Commercial Flat Roofs Costs More Than You Think
- Step 1: Run a Commercial Roof Inspection Checklist Twice a Year
- Step 2: Fix Flat Roof Drainage Solutions Before Rainy Season
- Step 3: Seal Roof Penetrations, Flashing, and Seams
- Step 4: Find Trapped Moisture in Commercial Roofs Before It Spreads
- Step 5: Apply Flat Roof Condensation Prevention Inside the Building
- Step 6: Handle Storm Damage and Wind Damage Fast
- Conclusion: Build a Year-Round Plan for Preventing Moisture Damage in Commercial Flat Roofs
- Frequently Asked Questions
Last Updated: October 21, 2026
Why Moisture Damage in Commercial Flat Roofs Costs More Than You Think
Water is patient. That slow timeline is what makes preventing moisture damage in commercial flat roofs so important, and so easy to postpone.
A small, slow leak can turn into saturated insulation, rusted decking, and interior repairs that cost far more than the original fix. The water rarely shows up where it enters. It travels along the roof deck and drips somewhere else entirely.
Here's the part most building owners miss: by the time a ceiling stain appears, the moisture has usually been trapped for a while.
Step 1: Run a Commercial Roof Inspection Checklist Twice a Year
A commercial roof inspection checklist is a written, repeatable list of what to check on every visit. Twice a year is the baseline, plus after any major storm. But the cadence matters as much as the list. Most facility teams get more value from a schedule tied to seasons and weather events than from a single annual walk-through.
Build a three-tier inspection schedule
Post-storm inspections (within 24-48 hours of any significant wind or hail event). You do not need the full checklist here. Focus on the items storms damage first: roof edges and corners, fascia and edge metal, field seams, penetration flashings, and drains.
Triggered inspections (as needed). Any interior ceiling stain, musty odor, soft spot underfoot, or report of a leak warrants a roof visit within a few days, not at the next scheduled inspection.
What the checklist should cover
- Membrane surface: cracks, blisters, punctures, scuffs, and worn or lifted seams
- Drains, scuppers, and gutters: clear of leaves, gravel, and debris; strainers and drain rings intact
- Flashing and pipe boots: tight, uncracked, and sealed at every penetration
- Ponding water: any standing water 48 hours after rain
- HVAC curbs and vent pipes: secure curbs, intact seals, no rust at the curb base
- Roof edges and terminations: fascia, edge metal, and coping secure with no gaps
- Interior ceilings and walls: new stains, sagging, bubbling paint, or musty smells
A common mistake is checking only the roof surface. Look inside too. Interior clues often show up before exterior ones, and an interior stain tells you water has already crossed the membrane.
Document every visit the same way
A checklist is only useful if the records are comparable visit to visit. For each inspection, capture:
- Date, inspector name, and weather conditions at the time of inspection
- Dated photos from the same fixed angles each visit, corners, each drain, each HVAC curb, each roof access point
- A short note on any change since the last visit, even if no repair is needed yet
- A priority flag for anything that needs action before the next scheduled visit
A dated photo log lets you spot slow changes, a seam spreading, a drain ring pulling loose, a blister growing, that a single visit would miss. It also gives you a defensible record if a warranty or insurance claim comes up later.
Prioritize what you find
Not every checklist item carries the same urgency. A practical triage:
- Fix now: open seams, torn membrane, missing flashing, clogged drains during storm season, any active interior leak
- Fix before next rainy season: cracked pipe boots, worn sealant at curbs, minor blisters, slow-draining scuppers
- Monitor: hairline surface cracks, small areas of surface wear, minor ponding that clears within 48 hours
This triage is what turns an inspection into a maintenance plan. Without it, every finding looks equally urgent and nothing gets scheduled.
Step 2: Fix Flat Roof Drainage Solutions Before Rainy Season
Flat roof drainage solutions are the systems that move water off the roof: roof drains, scuppers, gutters, and downspouts. Clear them before the rainy season, not during it.
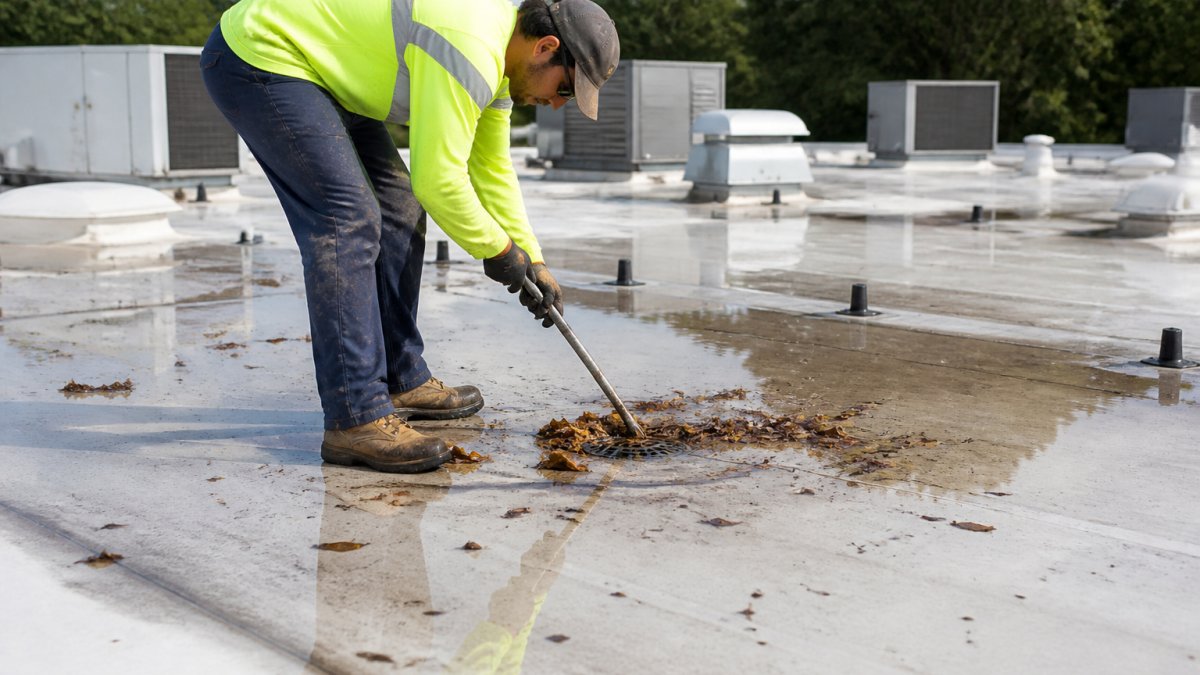
Water that can't drain has nowhere to go but into the roof assembly. Ponding water is the leading warning sign. If standing water remains 48 hours after rain, the drainage system is failing somewhere.
Work through these before storm season:
- Clear debris from every drain and scupper
- Check drain rings and strainers for cracks
- Confirm downspouts flow freely and aren't blocked
- Trim tree branches away from the roof edge
- Verify the roof slope still directs water to drains
Old roofs often lose their slope over time as insulation settles. If water pools in the same spot every season, that low point needs a real fix, not another round of debris removal.
Step 3: Seal Roof Penetrations, Flashing, and Seams
Roof penetrations are the openings cut through the membrane for HVAC units, vent pipes, and drains. They are the most common entry point for water on any flat roofing system.
Every penetration needs proper flashing, a rain collar, and a sealed field wrap. Pipe boots crack with age and sun exposure. Sealant dries out and pulls away from the membrane. Both fail quietly.
Check these spots every inspection:
- Pipe boots and rain collars: no cracks, tight fit
- HVAC curbs: sealed edges, no rust
- Vent pipes: secure, with intact flashing
- Roof seams: no lifting, splitting, or open edges
- Fascia and edges: secure terminations, no gaps
What most guides miss is that sealant is a short-term patch, not a repair. Fresh sealant over a failing seam buys time, but the seam itself still needs attention.
Step 4: Find Trapped Moisture in Commercial Roofs Before It Spreads
Trapped moisture in commercial roofs is water that has entered the roof assembly and can't escape. It saturates insulation and decking from the inside, where no surface inspection can see it. This is the hidden risk: a roof can look fine on top while the insulation below is soaked.
Signs you can see without tools
- Soft or spongy spots underfoot
- Bubbles or blisters in the membrane
- Interior stains that spread after rain
- A musty smell inside the building
- Sagging deck areas
These signs show up late. By the time a ceiling stain appears, the moisture has usually been trapped for a while. Detection tools are how you find it earlier.
How moisture detection actually works
Infrared surveys. An infrared camera reads surface temperature differences across the roof.
Moisture meters. Handheld meters read moisture content at the surface or just below it, depending on the type.
Core sampling. A core sample is a small cut through the roof assembly, membrane, insulation, and sometimes deck, that lets you see and physically test each layer.
A common pattern is to use infrared as the screening pass, moisture meters to confirm and map the boundaries, and core samples to confirm depth before committing to a repair scope.
Decide: surface repair or full removal?
This is the decision most guides skip, and it is the one that determines whether the problem comes back.
A surface repair may be sufficient when:
- The moisture is confined to a small area and the insulation below is dry (confirmed by core sample)
- The leak source is identified and fixed
- The deck is sound and not delaminating
- The wet area has not spread since the last inspection
Removal and replacement of wet materials is usually required when:
- Insulation is saturated, wet insulation loses R-value and rarely dries in place under a membrane
- The deck is soft, rusted, or delaminating
- The wet area is large or has spread between inspections
- The leak source can't be pinpointed, meaning water is still entering
- There is a vapor barrier or membrane above the wet layer that traps moisture in
Once insulation or decking is saturated, drying rarely works. Wet roof assemblies usually need the soaked materials removed and replaced, along with the source of the leak. That's why early detection matters so much: the difference between a surface repair and a full tear-off of the wet zone is usually a matter of how long the moisture sat undetected.
What to document before repair
Before any repair scope is priced, record the core sample locations, the mapped wet area, and the confirmed leak source. This record protects you if the same area leaks again and gives the next contractor a starting point instead of a guess.
Step 5: Apply Flat Roof Condensation Prevention Inside the Building
Flat roof condensation prevention is about stopping moisture that forms inside the building from ever reaching the roof assembly. This is the angle most maintenance plans skip entirely.
Warm, humid air rises. When it meets a cold roof deck, it condenses into water, just like a cold drink on a summer day. That water soaks into insulation from below.
Control it with three basics:
- Ventilation: exhaust humid air from kitchens, bathrooms, and work areas
- Vapor control: keep the vapor barrier intact and sealed
- Indoor humidity: keep levels in check, especially in winter
A roof that keeps leaking in the same spot despite good surface repairs often has a condensation problem, not a leak. Fixing the roof won't help until the indoor moisture source is handled.
Step 6: Handle Storm Damage and Wind Damage Fast
Storm damage and wind damage open the door to water intrusion fast. A lifted edge or torn seam during heavy rainfall can soak a roof assembly in hours.
Wind damage often hides at the roof edges and corners, where uplift is strongest. Fascia, edge metal, and terminations take the first hit. Check these right after any major storm, along with seams and penetrations.
What to do after a storm:
- Document damage with dated photos before anything is moved
- Clear debris from drains immediately
- Tarp or patch open areas to stop water entry
- Call a professional for a full assessment
- Keep records for any insurance claim
Speed matters more than perfection here. A quick temporary patch that stops water beats a perfect repair scheduled for next week.
Conclusion: Build a Year-Round Plan for Preventing Moisture Damage in Commercial Flat Roofs
Preventing moisture damage in commercial flat roofs comes down to routine, not luck. Twice-yearly inspections, clear drainage, sealed penetrations, moisture detection, indoor humidity control, and fast storm response form one connected system.
Miss one piece and the others work harder to compensate. Get all six right and small issues stay small.
If you manage commercial property and want a roof plan built around your building, Certified Roofing Solutions Inc. offers commercial roof inspections, TPO and metal roofing work, and preventative maintenance programs. Our team handles repairs, installs, and storm response. Book an appointment today and get a roof plan that protects your building year-round.
Frequently Asked Questions
What are some effective drainage solutions for flat roofs?
Start with roof drains, scuppers, gutters, and downspouts sized for the roof area. Keep them clear of debris with routine maintenance and tree trimming. Check that the roof slope provides positive drainage so water flows to outlets instead of sitting in low spots. If ponding water remains 48 hours after rain, add tapered insulation or adjust drain placement. A commercial roof inspection checklist should include drain flow tests before every rainy season.
How often should a commercial flat roof be inspected for moisture damage?
Schedule a professional inspection twice a year, in spring and fall, plus after any heavy rainfall or storm damage event. Property managers should also do a quick visual walk-through monthly, looking for ponding water, membrane damage, and debris. A commercial roof inspection checklist helps track changes over time. Catching trapped moisture in commercial roofs early prevents insulation replacement and structural damage that costs far more than routine maintenance.
What causes moisture to become trapped in a flat roof?
Trapped moisture in commercial roofs usually comes from three sources: water infiltration through failed flashing, seams, or penetrations; condensation forming under the roof membrane when warm interior air meets a cold deck; and ponding water that seeps into small cracks. Once inside, moisture soaks roof insulation and cannot evaporate. This is why flat roof condensation prevention and prompt leak repair matter. Signs include sagging, blistering, and musty odors inside the building.
How can you prevent ponding water on a commercial flat roof?
Ponding water forms when the roof slope is too shallow, drains are clogged, or the deck has settled. Clear debris from roof drains and scuppers regularly, and have a roofer check that positive drainage moves water off the roof within 48 hours of rain. If low spots persist, tapered insulation or a re-sloped deck can correct them. Pair drainage fixes with flat roof condensation prevention and routine maintenance to keep moisture from becoming a structural problem.