 how-to
Repairing Wind Damaged Asphalt Shingles Yourself
Table of Contents
- How to Tell If Your Roof Has Wind Damage
- Safety Gear and Tools for Repairing Wind Damaged Asphalt Shingles Yourself
- What Belongs in a Roof Shingle Repair Kit
- Step-by-Step: Removing and Replacing Lifted or Missing Shingles
- Matching Shingle Colors and Aging for a Seamless Repair
- Cold Weather Risks and When to Delay Your Repair
- Documenting Damage for an Insurance Claim
- The Cost of Professional Roof Repair vs. DIY
- Frequently Asked Questions
Last Updated: September 28, 2026
How to Tell If Your Roof Has Wind Damage
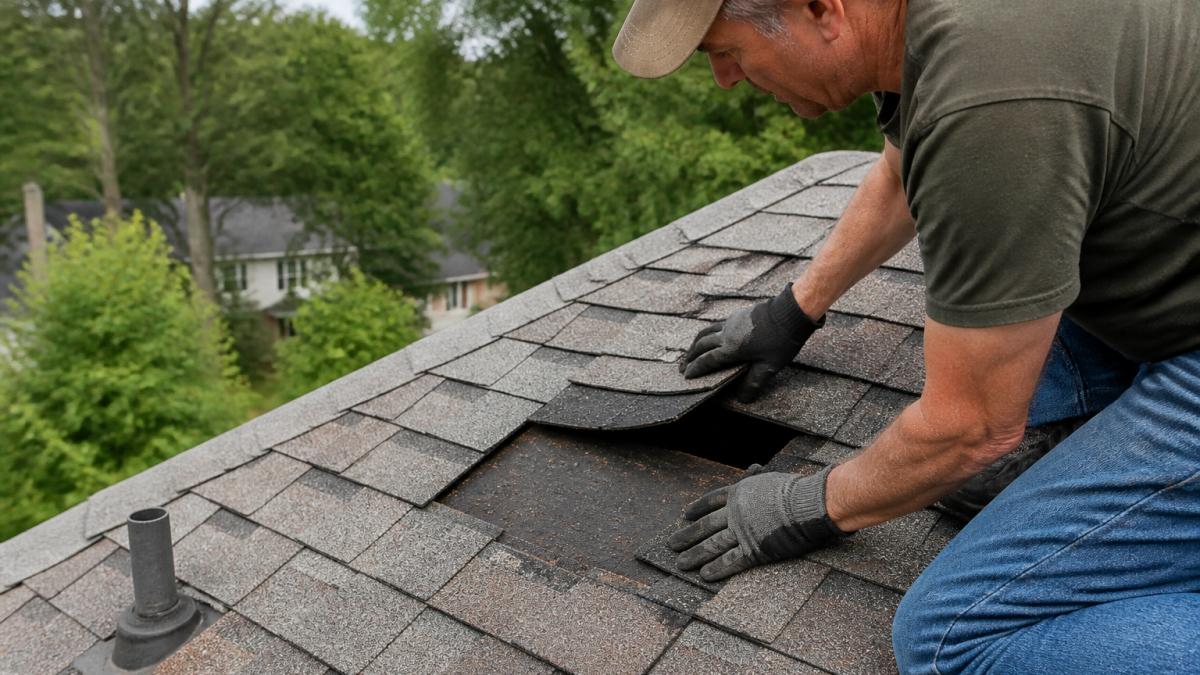
Repairing wind damaged asphalt shingles yourself starts with knowing what you're looking at. Wind damage rarely shows up as a dramatic hole; it appears as subtle changes that worsen with every storm.
Warning Signs You Can Spot from the Ground
Grab binoculars and walk your property line, no climbing needed.
Look for these signs:
- Shingle tabs sitting in your yard or gutters
- Dark patches on the roof where shingles used to be
- Granule loss piling up at downspouts (looks like coarse sand)
- Lifted or curling shingles along roof edges and ridges
- Dented gutters, vents, or flashing
What Wind Damaged Shingles Look Like Up Close
From the ground, damage can look minor. Up close, it's a different story.
Other close-up signs:
- Cracked or torn shingle tabs
- Missing sealant strips (the shingle lifts with light finger pressure)
- Exposed nail heads where shingles shifted
- Lifted flashing around chimneys and vents
Safety Gear and Tools for Repairing Wind Damaged Asphalt Shingles Yourself
A roof repair is a fall-risk job. The gear isn't optional.
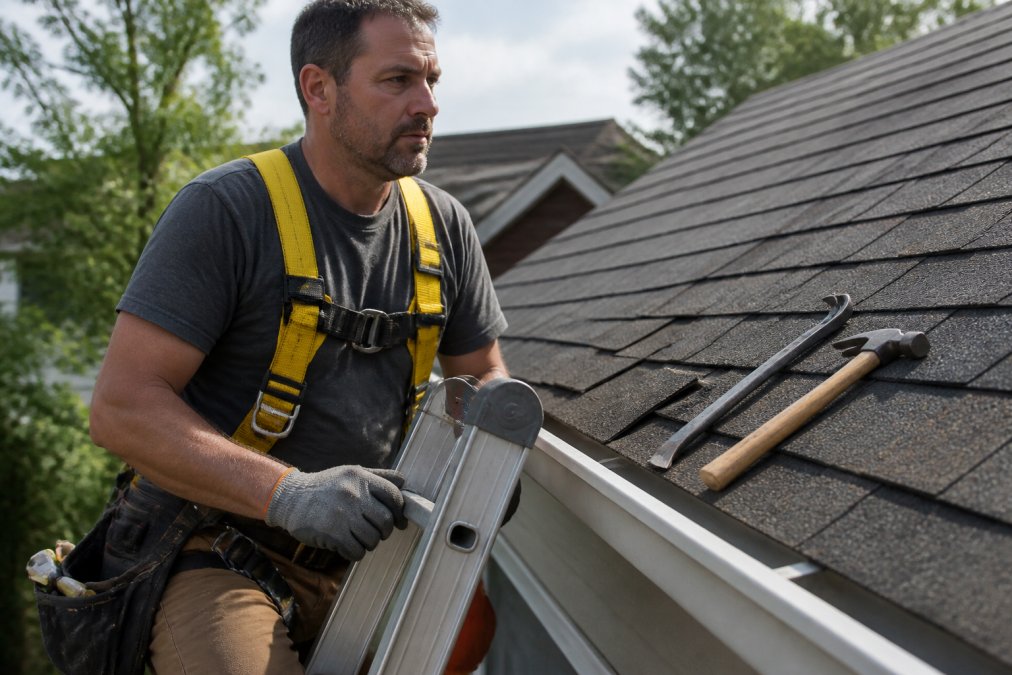
Personal protective equipment (PPE) for roof work includes:
- A properly fitted safety harness anchored to a solid point
- Non-slip work boots with good tread
- Work gloves for grip and cut protection
- Safety glasses for debris
Tool Rental vs. Purchase: What Makes Sense for One Repair
For a single repair, renting beats buying almost every time: hand tools are cheap, but a nail gun is not.
The rule: buy small hand tools, rent powered ones.
- Buy: utility knife, pry bar, roofing hammer, caulking gun, wire brush
- Rent: nail gun, safety harness, extension ladder (if you don't own one)
- Skip: anything you'll use once and never again
What Belongs in a Roof Shingle Repair Kit
A good roof shingle repair kit covers removal, replacement, and sealing.
Gather these before you climb up:
| Item | Purpose | Buy or Rent |
|---|---|---|
| Pry bar | Lift and remove damaged shingles | Buy |
| Utility knife | Cut shingles and underlayment | Buy |
| Roofing hammer | Drive and set roofing nails | Buy |
| Caulking gun | Apply roofing cement | Buy |
| Roofing nails | Fasten shingles (1.25 inch, galvanized) | Buy |
| Roofing cement | Seal tabs and edges | Buy |
| Replacement shingles | Match existing roof | Buy |
| Safety harness | Fall protection | Rent |
| Nail gun | Faster fastening | Rent |
Step-by-Step: Removing and Replacing Lifted or Missing Shingles
This is the core of repairing wind damaged asphalt shingles yourself. Understanding why each step matters separates a repair that holds from one that fails at the next storm.
Troubleshooting Common DIY Mistakes
Even careful homeowners hit snags. How to handle the most common ones:
- The new shingle won't sit flat. This usually means a nail head from the shingle above is protruding, or the underlayment is bunched. Lift the shingle above, check for obstructions, and reset.
- The sealant won't bond. Cold or damp conditions prevent proper curing. Wait for a dry day above 50°F, or use a cold-weather roofing cement formulated for lower temperatures.
- You tore the shingle above. Don't try to hide it. Remove the torn shingle and replace it too. A torn shingle above your patch will lift in the next wind and expose your repair.
- The repair area still leaks. Water can travel along the deck before it drips. Check the flashing and the shingles uphill of your patch, not just the patch itself.
Nailing and Hand-Sealing the Replacement Shingles
Nail placement matters more than most people think. Drive nails straight, not at an angle.
Matching Shingle Colors and Aging for a Seamless Repair
New shingles rarely match an old roof perfectly. That's normal, here's how to handle it.
Here's how to get a closer match:
- Bring a damaged shingle to the store for a color match
- Ask about "weathered" or aged-look replacement shingles
- Check your attic or garage for leftover shingles from the original install
- Accept that some color difference is unavoidable on an older roof
Cold Weather Risks and When to Delay Your Repair
Cold weather changes the rules: asphalt shingles turn brittle in low temperatures.
Cold-weather risks include:
- Brittle shingles that crack during handling
- Roofing cement that won't cure properly
- Sealant strips that won't bond until warm weather returns
- Ice and frost creating slip hazards on the roof
Documenting Damage for an Insurance Claim
Most homeowners skip documentation until it's too late. Do it before you touch anything, it determines whether your claim is approved or denied.
What to Photograph (and How)
Document your claim with:
- Wide shots of each roof slope from the ground, showing the full roof and surrounding damage. Take these first, before any close-ups.
- Mid-range shots of each damaged area, showing the shingle in context with its neighbors.
- Close-ups of creased, cracked, or missing shingles. Include a coin, tape measure, or your hand in the frame for scale, adjusters use scale to estimate repair size.
- Photos of the ground showing fallen shingles, granules, or debris. This corroborates the roof damage.
- Photos of interior water stains, if any, along with the ceiling or wall area above them.
- Photos of damaged gutters, vents, or flashing, which often take the first hit in a windstorm.
Adjusters often deny claims when damage looks like wear and tear rather than a single storm event. Timestamped photos taken immediately after the storm are the strongest counter.
The Written Record
Photos alone aren't enough. Keep a written log that includes:
- The date and time of the storm
- The date and time you first noticed the damage
- A description of each damaged area and its approximate size
- The date you called your insurer and the claim number they gave you
- The name of any adjuster assigned to your claim
- Receipts for any materials you buy, even temporary ones like tarps
Timing and the Adjuster Visit
Most policies require reporting wind damage within a reasonable time, often one year, though some are stricter. Check your policy or call your agent. Waiting too long gives the insurer grounds to deny on timeliness alone.
What Not to Do
- Don't repair before documenting. Even a temporary fix can erase the evidence an adjuster needs.
- Don't discard damaged shingles. Keep them in a bag or on the ground until the claim is settled. They're physical evidence.
- Don't sign anything from a contractor before your insurer has assessed the damage. Some contractors ask you to sign a contract or an assignment of benefits before the claim is filed, which can complicate your relationship with your insurer.
- Don't exaggerate. Inconsistent or inflated claims are a common reason for denial and can create legal problems.
The Cost of Professional Roof Repair vs. DIY
DIY saves money upfront, but only if the repair holds. Professional roof repair includes labor, materials, and a warranty on the work.
Consider going pro when:
- The damage covers a large area
- You find soft spots or water damage in the roof deck
- Your roof pitch is steep
- You're not comfortable working at height
- You need help with an insurance claim
Frequently Asked Questions
What can I do if my shingles are lifted by wind?
If shingles are lifted but still intact, you can often reseal them. Wait for a warm, dry day so the sealant strip softens, then apply a bead of roofing cement under each lifted tab and press it down firmly. If the shingle is creased or cracked, it needs to be replaced instead. Check the surrounding area for granule loss and loose nail heads, since wind damage rarely affects just one shingle.
Will insurance cover shingles damaged by wind?
Most homeowners insurance policies cover wind damage to asphalt shingles, but the claim depends on your deductible and the age of your roof. Document everything before you repair anything: photograph missing shingles, granule loss, and any interior water stains. Keep receipts for materials. If the damage is widespread, an adjuster will typically inspect before you file. Repairing first without documentation can weaken your claim.
What type of roof patch is best for asphalt shingles?
For small repairs, a roof shingle repair kit with roofing cement and replacement shingles matched to your existing ones works well. Avoid peel-and-stick patches on visible areas, since they rarely match the surrounding shingles. For larger sections, replace the damaged shingles individually using roofing nails and seal the tabs with roofing cement. The patch should sit flush with neighboring shingles to maintain water shedding.
Is it safe to walk on a roof to repair shingles?
Walking on a roof is risky, especially after wind damage when shingles may be loose. Use a safety harness anchored to a solid point, keep your ladder at a stable angle, and avoid walking on steep pitches or wet surfaces. If your roof pitch is steep or you are unsure about the structural integrity of the roof deck, call a professional. Falls from roofs are a leading cause of home repair injuries.
Wind damage rarely stays small. A lifted shingle today becomes a water-stained ceiling next month. If your repair is more than a quick patch, Certified Roofing Solutions Inc. can inspect the full roof, document damage for your insurance claim, and handle the work safely. Our team offers top-quality repairs, tailored solutions for every roof type, and a commitment to excellence on every project. Get started with Certified Roofing Solutions Inc. and book an appointment today.