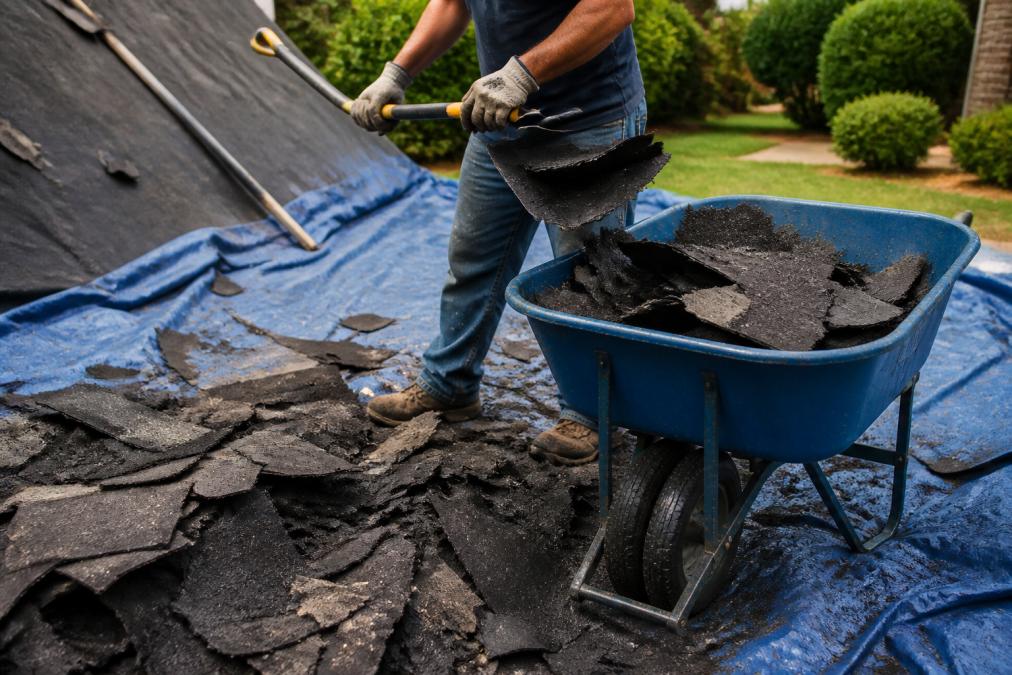
 how-to
Roofing Debris Cleanup Best Practices for Homeowners
Table of Contents
- Why Roofing Debris Cleanup Best Practices Matter
- Roofing Job Site Safety Protocols Before Cleanup Starts
- Setting Up a Drop Zone and Protecting Your Landscaping
- How to Remove Nails from Lawn After Roofing
- Residential Roofing Cleanup Checklist for Every Job
- Environmental Disposal and Liability Considerations
- Conclusion: Ensure Your Property Is Left Clean and Safe
- Frequently Asked Questions
Last Updated: September 9, 2026
Why Roofing Debris Cleanup Best Practices Matter
Roofing debris cleanup best practices are the systematic methods for removing shingles, nails, and underlayment after a roof installation or repair, ensuring the site is returned to a safe, clean condition. A roof replacement can generate thousands of pounds of waste, and without a structured plan, that material ends up embedded in your lawn, clogging your gutters, or scattered across your driveway. We consistently see that cleanup quality separates a professional job from a careless one.
Most homeowners focus entirely on the new shingles and never think about the old ones. Loose nails pose a genuine safety hazard to children, pets, and vehicle tires. Leftover debris can also damage lawnmowers and create drainage problems that lead to costly repairs. Below, we'll walk through the exact protocols professional crews use to protect your property, from the first safety briefing to the final magnetic sweep.
Roofing Job Site Safety Protocols Before Cleanup Starts
Roofing job site safety protocols begin before the first shingle is removed, with a clear plan for fall protection, debris containment, and ground crew communication. Every crew member should wear PPE including hard hats, safety glasses, work gloves, and non-slip footwear. For steep-slope roofing, safety tie-offs to anchor points are the primary defense against falls, the leading cause of serious injury in construction (osha.gov).
The cleanup process requires the same discipline as the tear-off. Establish exclusion zones beneath the work area so no one walks under active debris removal. Coordinate with the ground crew using hand signals or radios so dumping only happens when the drop zone is clear. Debris management must be planned from the moment the crew arrives, not treated as an afterthought.
Gathering the Right Safety Gear and Tools
Before any debris touches the ground, verify you have the correct equipment. A magnetic sweeper is the single most important tool for recovering nails from grass and soil, and it should be used at the end of every job. Other essentials include heavy-duty tarps, a sturdy wheelbarrow, industrial-grade trash bags, and a pry bar for removing remaining fasteners.
Setting Up a Drop Zone and Protecting Your Landscaping
The drop zone is where roofing waste is lowered to the ground, and its placement determines how much damage your yard sustains. Choose a location clear of landscaping, irrigation lines, and walkways, and lay down thick tarps to catch debris and protect the grass. Position a roll-off dumpster or disposal bins as close as possible to minimize the distance debris must be carried.
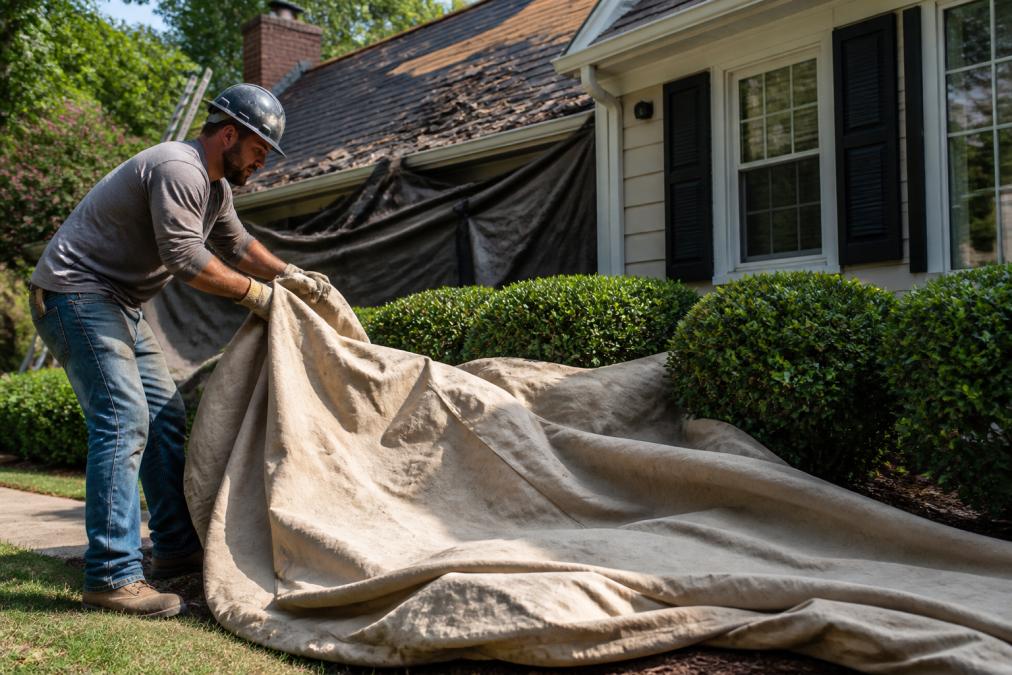
Protecting your landscaping requires proactive measures. Cover delicate shrubs and flower beds with plywood or padded tarps before work begins, and lay plywood runners over the lawn in high-traffic areas to prevent soil compaction and rutting. If you have a newly seeded lawn or fragile ground cover, discuss a specialized protection plan with your contractor before the job starts.
How to Remove Nails from Lawn After Roofing
Removing nails from a lawn after a roofing project goes far beyond a single pass with a magnet. The goal is to recover every ferrous fastener before it becomes a hazard to people, pets, or lawn equipment. A systematic approach, grounded in the physics of how nails fall and how magnets work, is the only way to achieve a truly clean site.
Understanding the Mechanics of a Magnetic Sweeper
A magnetic sweeper is not a simple magnet on wheels; its effectiveness depends on specific operational parameters. The magnet's strength, rated in pounds of pull, and its clearance height above the ground are the two most critical variables. For roofing debris, a pull rating of at least 100 pounds is recommended to lift nails that may have partially sunk into the soil. On uneven ground, the magnet can be too high to catch nails that are not fully exposed.
Most professional crews use a sweeper with a 36-inch or larger magnet head to cover more ground per pass. However, a wider head can be less effective on uneven terrain, as it may bridge over dips where nails have settled. The most effective technique involves adjusting your pace and overlap based on ground conditions.
A Detailed, Multi-Surface Sweeping Protocol
The most common failure is a single, hasty pass. Roofing nails that fall from a steep pitch often bounce and roll, coming to rest in unpredictable patterns. They can land point-down in thatch, become lodged in concrete driveway cracks, or be hidden beneath a thin layer of soil.
- The Grid Pattern: Divide the entire work area into a mental grid. Begin at the farthest point from the drop zone and walk in straight, parallel lines, similar to mowing a lawn. Overlap each pass by at least 6 inches to ensure you don't miss a strip. This is your primary sweep.
- The Perpendicular Pass: After completing the grid, walk the same area again, but this time in a direction perpendicular to your first pass. This is not optional. A nail that lies flat and parallel to your first sweep direction may not be picked up because its magnetic poles are aligned in a way that doesn't attract the sweeper's field. The second pass, at a 90-degree angle, will catch these.
- The High-Traffic Zone Focus: Pay special attention to the area directly beneath the roof's eaves and the path from the drop zone to the dumpster. This is where nails are most concentrated. Walk these zones slowly, and consider making a third pass over them.
- The Surface-Specific Search:
- Grass and Thatch: After the sweeper passes, get low and visually inspect the grass. Nails can be hidden in thick thatch. Use a handheld magnetic wand to probe the base of the grass, especially near the roof's edge where nails tend to bounce and scatter.
- Concrete and Asphalt: Nails often find their way into expansion cracks or between pavers. A magnetic sweeper may not have the clearance to pull them out of these recesses. Use a handheld magnetic wand or a strong magnet attached to a long pole to meticulously check every crack and joint in your driveway, walkway, and patio.
- Mulch and Flower Beds: This is the most challenging area. A magnetic sweeper is nearly useless on deep mulch. The only reliable method is a slow, methodical hand search. Use a garden rake to gently turn over the top layer of mulch, then pass a strong magnetic wand over the disturbed area. This process must be repeated until you are confident the area is clean.
The Final Verification: The Tire Test
A final, practical check is to visually inspect the treads of any vehicle that was parked near the work area. A single nail embedded in a tire is a clear sign that your sweeping protocol missed something. This is a common pattern that reveals a gap in the cleanup process, and it is a check that every homeowner should perform before the contractor leaves the site.
By understanding the limitations of your tools and the physics of the debris, you can execute a nail removal protocol that is thorough, verifiable, and safe. This level of detail is what separates a professional cleanup from a cursory effort.
Residential Roofing Cleanup Checklist for Every Job
A universal checklist is a good starting point, but it fails to address a critical reality: the debris from an asphalt shingle roof is fundamentally different from that of a metal or tile roof. A truly professional cleanup protocol is tailored to the material being removed. The following breakdown provides the material-specific steps that should be added to your standard checklist to ensure no debris is left behind.
Asphalt Shingle Roofing Cleanup
Asphalt shingles are the most common roofing material, and their cleanup presents unique challenges due to the granular grit that sheds from them.
- Grit Management: The primary issue is the fine, sand-like grit that accumulates in gutters and on the ground. This grit is highly abrasive and can damage downspouts and clog drainage systems. Your checklist must include a dedicated step for flushing gutters with a high-pressure hose, not just a visual inspection. The water runoff from the flushing should be directed away from your foundation.
- Underlayment Retrieval: Felt underlayment is lightweight and can tear into pieces that blow far from the drop zone. The cleanup crew must perform a perimeter walk that extends well beyond the immediate work area, checking fences, shrubs, and neighboring properties for stray pieces of felt.
- Nail Recovery: Asphalt shingles are secured with roofing nails, which are the primary hazard. The two-pass magnetic sweeping protocol is non-negotiable. The high volume of nails used means that a single pass is statistically likely to miss a significant number of fasteners.
Metal Roofing Cleanup
Metal roofing panels are often removed in large sections. The debris profile is different, but the hazards are just as real.
- Sharp Metal Edges: The most significant danger is from sharp, cut edges of metal panels and metal shavings from screws. These can cause severe lacerations. The cleanup crew must wear heavy-duty leather gloves, not just standard work gloves. All metal offcuts must be immediately placed in a designated scrap bin to prevent contact.
- Screw and Fastener Recovery: Metal roofs are typically fastened with self-tapping screws that have a rubber washer. These screws are larger than roofing nails and can be easily picked up by a magnetic sweeper. However, the rubber washers can deteriorate over time, leaving the steel screw exposed. A magnetic sweep is still required, but the primary focus should be on a visual inspection for any stray metal shavings that the magnet might not catch.
- Panel Stacking: Removed metal panels are often stacked for disposal. The area where these panels are stacked must be protected with thick tarps to prevent the sharp edges from gouging the lawn or driveway. The stack should be secured to prevent wind from catching the panels and turning them into projectiles.
Tile Roofing Cleanup
Concrete and clay tile roofs are heavy and brittle, creating a unique debris field of broken shards and dust.
- Broken Shard Removal: The primary hazard is from sharp, broken pieces of tile that can easily cut through footwear or puncture a tire. A magnetic sweeper is useless for this material. The cleanup protocol must rely on a systematic visual inspection and manual pickup. Crew members should use a stiff-bristled broom to sweep the area, gathering shards into a dustpan for disposal.
- Dust Control: Tile removal generates a significant amount of silica dust, which is a respiratory hazard (the CDC). The cleanup process should include a final step of wetting down the ground area to suppress dust before the final inspection. This is a critical safety measure that is often overlooked.
- Structural Debris: The mortar or adhesive used to secure tiles can break into large, heavy chunks. These must be removed by hand and placed in the disposal bin. The drop zone for tile roofing must be reinforced with plywood, as a standard tarp will not protect the ground from the impact of falling tile.
The Material-Specific Checklist Addendum
To make this practical, here is the addendum to your standard checklist:
| Material | Specific Task | Why It's Critical |
|---|---|---|
| Asphalt | Flush all gutters and downspouts with water | Removes abrasive grit that causes clogs and corrosion |
| Asphalt | Perimeter walk for stray underlayment | Prevents unsightly debris from blowing onto neighboring properties |
| Metal | Use heavy-duty leather gloves for all handling | Protects against severe cuts from sharp metal edges |
| Metal | Visual inspection for metal shavings and screws | Catches debris that a magnetic sweeper may miss |
| Tile | Wet down the work area to suppress dust | Prevents respiratory irritation from silica dust |
| Tile | Manual pickup of all broken shards | The only effective method for non-ferrous, brittle debris |
By integrating these material-specific steps into your cleanup checklist, you are performing a risk assessment and mitigation plan tailored to the job. This level of detail protects the homeowner and demonstrates a contractor's true professionalism.
Environmental Disposal and Liability Considerations
Roofing waste disposal is subject to environmental regulations that vary by state and municipality, and improper handling can result in fines or legal liability. Asphalt shingles are technically recyclable, and many jurisdictions process them into road base material (the EPA). However, most roofing waste goes to a landfill, so confirm your contractor uses a permitted waste disposal facility rather than an unlicensed hauler.
Liability is another angle most homeowners never consider. If a contractor leaves nails in your yard and a child steps on one, or if debris damages a neighbor's property, who is responsible? A professional contractor carries general liability insurance covering property damage and bodily injury. Before signing a contract, request proof of insurance and verify the policy is current to protect yourself from liability for accidents during the job.
Conclusion: Ensure Your Property Is Left Clean and Safe
A roof replacement is a significant investment, and the cleanup is the final measure of a contractor's professionalism. The difference between a crew that follows roofing debris cleanup best practices and one that treats cleanup as an afterthought is visible in the condition of your lawn, gutters, and landscaping for months after the job. Our commitment to excellence extends from the first shingle to the final magnetic sweep. If you are planning a roof repair or replacement in the Marietta or Alpharetta area, book an appointment with us today and experience our reliable, high-standard roofing services.
Frequently Asked Questions
How much cleanup should I expect after a residential roofing job?
A professional crew should leave your property free of all roofing debris. This includes nails, shingle scraps, underlayment, and packaging. Expect them to use a magnetic sweeper across your lawn and driveway to catch stray fasteners. They should also clear gutters of shingle grit and perform a final site inspection with you before leaving. If debris remains, address it before final payment.
How do I get nails out of my lawn after roofing work?
A magnetic sweeper is the most effective tool for removing nails from a lawn after roofing. Walk the entire yard in a grid pattern, especially near the drop zone and where dumpsters sat. For nails embedded near trees or landscaping, a strong handheld magnet can help. Consider a second pass after rain, as water can reveal nails that were initially missed.
What should be included in a residential roofing cleanup checklist?
Your roofing cleanup checklist should confirm the magnetic sweep of the lawn and driveway, removal of all shingle scraps and underlayment, and gutter cleaning to remove shingle grit and clogs. Verify that tarps and protective coverings are removed from landscaping and that the dumpster is hauled away. A final walkthrough to inspect for property damage completes the process.
Why are roofing job site safety protocols important during cleanup?
Roofing job site safety protocols protect both the crew and your family from hazards. They include establishing a drop zone to contain debris, wearing personal protective equipment, and using fall protection when working at height. Proper protocols also prevent property damage by directing debris away from landscaping and structures. A contractor following these protocols demonstrates professionalism and reduces liability.