 how-to
Hiring Roofers Who Protect Landscaping: 2026 Guide
Table of Contents
- Why Landscaping Protection Matters During Roof Work
- How to Prepare Your Yard for Roof Replacement
- Standard Protective Measures Professional Roofers Use
- Questions to Ask Roofing Contractors Before Hiring
- The Roofing Contract Property Protection Clause
- What to Do If Property Damage Occurs
- Post-Project Cleanup Checklist
- Final Steps: Verify the Work and Protect Your Home
- Frequently Asked Questions
Last Updated: September 8, 2026
Why Landscaping Protection Matters During Roof Work
A roof replacement involves hauling heavy materials, tearing off old shingles, and generating significant debris. When hiring roofers who protect landscaping, you are paying for a crew that respects your entire property.
This guide from Certified Roofing Solutions Inc. explains what professional property protection looks like, the questions to ask, and the contractual language that holds a crew accountable. We serve homeowners across Marietta, Alpharetta, Dunwoody, and Johns Creek. Hiring roofers who protect landscaping means understanding that a construction site can coexist with a healthy lawn and intact flower beds, but only with deliberate planning.
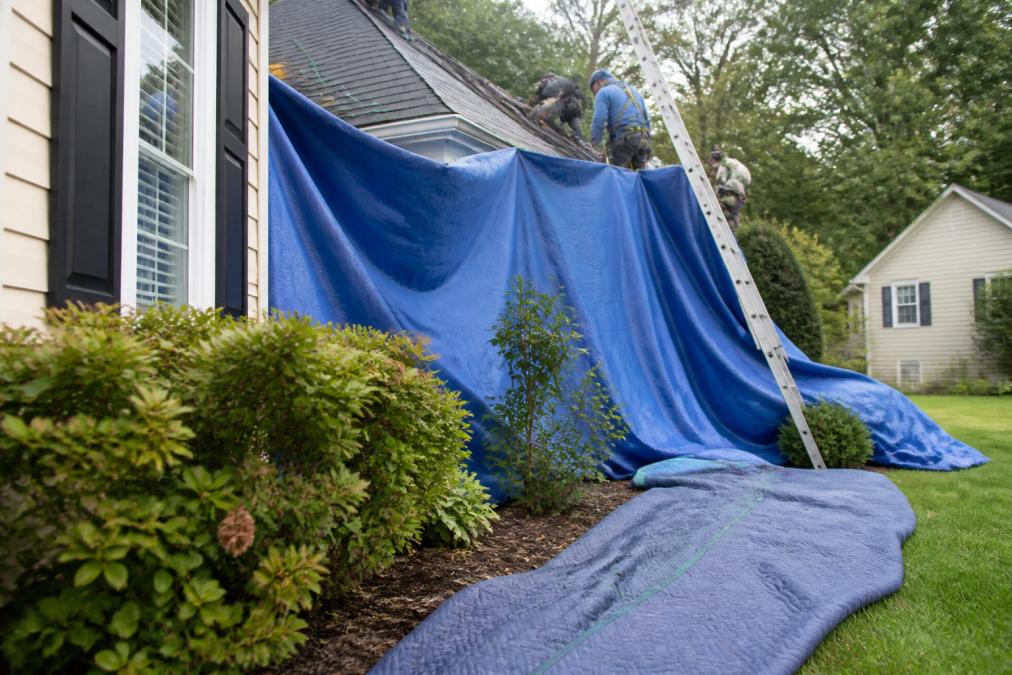
Most contractors promise to be careful, but promises are not a strategy. A professional crew arrives with tarps, plywood, and a written debris removal plan.
How to Prepare Your Yard for Roof Replacement
Preparing your yard is a shared responsibility. While the contractor handles heavy protective barriers, you can take several steps to minimize risk and make the crew's job easier.
- Trim Overhanging Branches: Cut back any limbs that touch or hang over the roof to prevent branches from scraping against siding and gutters.
- Mow the Lawn Short: A shorter lawn makes it easier to spot dropped nails and debris during the final cleanup and allows a magnetic sweeper to be more effective.
- Move Vulnerable Items: Relocate patio furniture, grills, potted plants, and yard ornaments away from the work area. If they are too heavy to move, ask the crew to cover them with a tarp.
- Identify Irrigation Lines: Mark the location of sprinkler heads and underground lines so the crew can avoid them when setting up staging areas or driving stakes.
- Communicate with Neighbors: Let adjacent homeowners know about the project, as debris and equipment can sometimes encroach on their property line.
These steps create a safer environment and reduce the chances of accidental damage before the crew arrives.
Standard Protective Measures Professional Roofers Use
Professional crews use a layered system of physical barriers and site-specific protocols to shield your property. The most common tools are heavy-duty tarps, visqueen (polyethylene sheeting), and plywood, laid over garden beds and grass to catch falling shingles, nails, and other debris.
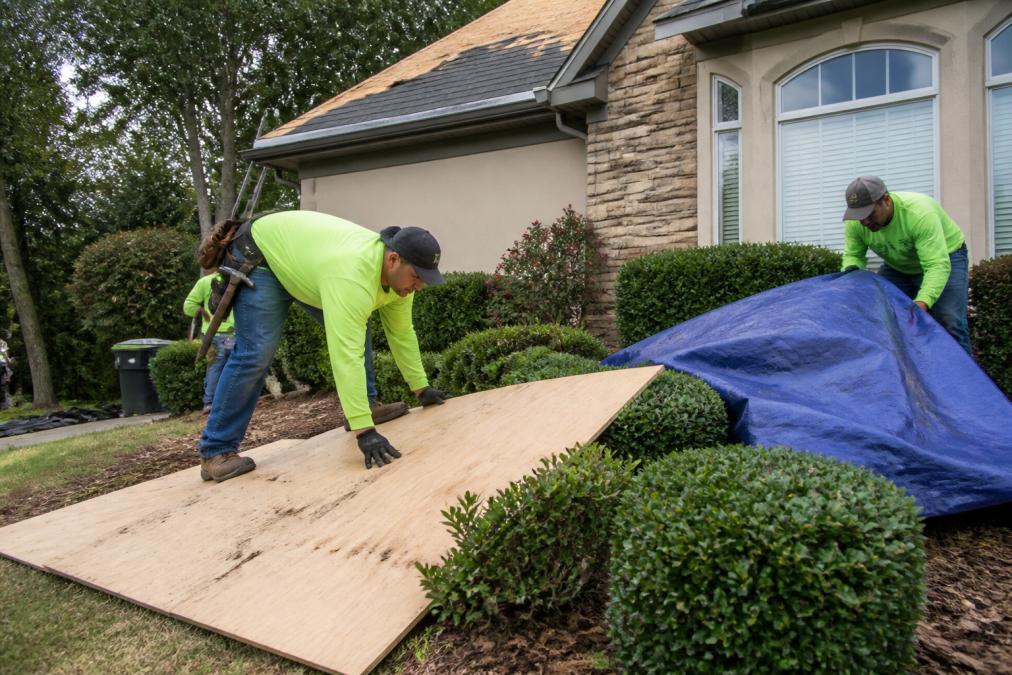
The difference between a crew that merely covers the ground and one that truly protects landscaping comes down to how they handle your plants' specific vulnerabilities.
Protecting Delicate Flower Beds and Root Zones
A tarp draped over a flower bed can crush stems and suffocate root systems if left for days. A professional crew uses a two-layer approach:
- Build a frame first: Place wooden stakes or tomato cages around tall perennials and fragile shrubs. Drape the tarp over the frame so it does not rest directly on the foliage, creating an air gap that prevents heat buildup and physical crushing.
- Use breathable ground cloth under the tarp: A layer of burlap or landscape fabric under the polyethylene sheeting allows air and moisture to reach the soil while still catching debris (extension.org). This matters for shallow-rooted plants like azaleas, hydrangeas, and boxwoods, which can suffer root dieback if the soil is sealed off for more than a day.
- Edge the tarp with sandbags or lumber, not stakes: Driving stakes through a tarp can sever underground sprinkler lines. Weighted edges achieve the same hold-down effect without penetrating the soil.
Irrigation System Protection: The Overlooked Step
Underground sprinkler heads are a common casualty of roof work. A crew rolling a heavy dumpster or staging plywood over a lawn can snap a sprinkler head flush with the ground, and the damage often goes unnoticed until the system is turned on weeks later. Ask the crew to:
- Flag every sprinkler head within 15 feet of the work perimeter before any equipment is moved in.
- Use plywood runways over any area where a wheelbarrow, dumpster, or ladder will travel. A single sheet of 3/4-inch plywood distributes weight and prevents the soil compaction that crushes underground PVC lines.
- Protect the valve box: If the irrigation manifold is near the house, ask the crew to cover it with a rigid plywood box, not just a tarp.
Gutter and Downspout Safeguards
Gutter protection prevents water damage to the foundation and soil around your plantings. A crew should use angled boards or foam inserts to keep granules and nails out of gutters, and flush downspouts with a hose before leaving. A clogged downspout can cause water to overflow and erode mulch beds, washing away soil and exposing roots.
Siding and Window Protection as a Plant Shield
Window and siding protection also protects landscaping. A broken window sends glass shards into flower beds, and a dented gutter can redirect water runoff onto a prized shrub. A professional crew covers windows near the work area with plywood or heavy plastic and uses gutter aprons or angled boards to deflect falling debris into tarped zones.
:::tip What to look for on a walkthrough When the crew does their pre-project walkthrough, ask them to point out exactly where each tarp will go and how they will anchor it. A crew that can articulate a plant-by-plant plan, not just "we'll cover the bushes", is a crew that has done this before.
The Weight of Debris: Why Material Choice Matters
A single bundle of architectural shingles weighs roughly 70 pounds, and the impact force when tossed from a two-story roof is substantial (osha.gov). Thin plastic sheeting tears on impact and offers almost no cushioning. Professional crews use 6-mil polyethylene for lightweight debris and 1/2-inch plywood or OSB boards in high-impact zones directly under the roof edge (the CDC). If a crew shows up with only blue tarps, that is a red flag. Ask to see their material list before the job starts.
This level of specificity separates a crew that treats your yard as a construction zone from one that treats it as an extension of your home. When hiring roofers who protect landscaping, protective measures are not an afterthought, they are a documented part of the project plan.
Questions to Ask Roofing Contractors Before Hiring
Before you sign a contract, ask specific questions about property protection. The answers will reveal whether a crew has a real system or is just giving you lip service:
- Do you use tarps and plywood to protect landscaping, and where do you place them? You want to hear specifics about garden beds, grass, and walkways.
- How do you handle debris removal? Ask if they use a debris chute, a dumpster, or if they will be tossing materials directly to the ground. Tossing materials to the ground is a red flag unless they have a strong tarp system in place.
- Are you licensed and insured? Verify that they carry liability insurance and workers' compensation.
- Will you protect my gutters and windows? Confirm that they have a plan to prevent clogging and breakage.
- Do you use magnetic sweepers for the final cleanup? This is a standard practice for finding nails in grass.
- Can you provide references from recent projects? Ask to see examples of how they protected landscaping on similar residential roofing jobs.
A professional crew will welcome these questions and have clear answers. A contractor who dismisses your concerns or gives vague answers is likely to treat your yard with the same lack of care.
The Roofing Contract Property Protection Clause
The scope of work in your contract should explicitly state how your property will be protected. Verbal agreements are not enough. A roofing contract property protection clause is a written commitment that holds the contractor accountable for damage.
This clause should state that the contractor will take reasonable measures to protect landscaping, including tarps and plywood; specify that the contractor is responsible for repairing or replacing any damaged items, including plants, fences, sprinkler systems, and other property; and outline the process for documenting existing damage before the project begins.
A well-written clause protects your homeowner rights. Without it, the contractor might claim damage was pre-existing or not covered. If a contractor is unwilling to include such a clause, consider that a significant warning sign.
What to Do If Property Damage Occurs
Even with the best planning, accidents can happen. The key is to address them quickly and professionally. If you notice damage, follow these steps:
Step 1: Document Everything, Immediately and Thoroughly
Take clear photos and video of the damage the moment you notice it. Do not move debris, do not attempt repairs, and do not let the crew "fix it later" without documentation. Include:
- A wide shot showing the damage in context with the house and the work area.
- A close-up of the specific damage, crushed plant, torn tarp, snapped sprinkler head.
- A timestamped video where you narrate what you see and the date and time.
- A photo of the pre-existing condition if you have one from the initial walkthrough. If you do not have one, that is a lesson for the next project: always take a full photo walkthrough of your yard before work begins.
Step 2: Notify the Crew Leader On the Spot
Point out the damage to the crew leader or project manager immediately. A responsible crew will often stop work, assess the issue, and address it right away.
Step 3: Invoke the Contract Clause, Not Just a Conversation
This is where the roofing contract property protection clause becomes your most powerful tool. If you included the specific language discussed earlier, you do not need to argue about who is at fault. The contract states the contractor is responsible for repairing or replacing any damaged items. Here is how to use it:
- Quote the exact clause in your written communication (email or text) to the contractor. Do not rely on a verbal conversation.
- Request a written acknowledgment of the damage and the agreed-upon remedy. If the contractor says they will "take care of it," ask them to put that in writing with a timeline.
- If the contractor disputes the damage, refer to the pre-project photo documentation. If they claim the damage was pre-existing, ask them to produce their own photos from the walkthrough. A professional crew takes their own documentation, and the absence of it works in your favor.
Step 4: Escalate to Insurance Only If Necessary
If the contractor is unresponsive or refuses to take responsibility, you have two options:
- File a claim with the contractor's liability insurance. You have the right to do this directly. The contractor's insurance carrier will investigate the claim. Your contract clause and photo documentation are the evidence they will use to determine liability.
- Contact your own homeowner's insurance provider. Your policy may cover the damage, but be aware that filing a claim can affect your premiums. Use this as a last resort, not a first step.
The 72-Hour Rule
Most property damage disputes are resolved or escalated within 72 hours of the incident. If the contractor has not acknowledged the damage in writing within three business days, send a formal written notice via email and certified mail. This creates a paper trail essential if you need to escalate to a state contractor licensing board or pursue legal action.
:::warning The silent damage trap Some landscaping damage is not visible until days or weeks later. A sprinkler line crushed by a dumpster may not leak until the system is pressurized. A shrub with a crushed root zone may not show wilting for two weeks. For this reason, do not sign a final release or pay the final invoice until you have done a full post-project inspection and, ideally, run your irrigation system once to confirm it is working.
What a Professional Crew Does Differently
A reputable contractor does not argue about damage they caused. They have a documented process for making it right. When hiring roofers who protect landscaping, part of that protection is knowing the crew has a clear, written procedure for handling damage claims.
Acting quickly, documenting thoroughly, and invoking your contract clause are the three pillars of protecting your property after an accident.
Post-Project Cleanup Checklist
A job is not finished when the last shingle is nailed down. Use this checklist to verify the site before the crew leaves:
- Magnetic Sweep: Ensure the crew has walked the entire property with a magnetic sweeper to collect stray nails.
- Debris Removal: Check that all construction debris, including old shingles, underlayment, and packaging, has been removed from the yard and flower beds.
- Tarps and Visqueen: Confirm that all protective barriers have been removed and properly disposed of.
- Gutter Inspection: Check that gutters and downspouts are clear of granules and debris.
- Lawn Raking: Rake the lawn to remove any remaining small debris and to help the grass recover from being covered.
- Check Flower Beds: Look closely at shrubs and plants for damage from falling materials or foot traffic.
- Walk the Perimeter: Do a final walkaround of the entire home exterior to check for damage to siding, windows, and trim.
This checklist is your final opportunity to catch issues before the crew departs. If you find problems, raise them before the job is officially closed.
Final Steps: Verify the Work and Protect Your Home
The final step is a comprehensive inspection of the completed work and the condition of your property. Walk the entire perimeter of your home and inspect the roof line from the ground. Look for any signs of damage to your landscaping that may have been missed.
If you are planning a roof replacement, we encourage you to ask the right questions and demand a high standard of care. At Certified Roofing Solutions Inc., our team is committed to protecting your property throughout the entire process, from the initial assessment to the final debris removal. We tailor our approach to the unique needs of your home and yard, ensuring your landscaping is not sacrificed for a new roof. Book an appointment today to discuss your project.
Frequently Asked Questions
How do roofers protect landscaping during a project?
Professional roofers protect landscaping by laying plywood walkways over vulnerable areas, securing tarps and visqueen over shrubs and flower beds, and using chutes or designated drop zones for debris. They also position dumpsters away from your garden and perform daily site cleanup. Before work begins, confirm the specific protective measures in your contract. Ask the crew to identify where they will place walk boards and tarps so you know exactly what to expect.
Is it standard for roofers to be responsible for landscape damage?
Yes, a reputable roofing contractor carries liability insurance that covers property damage, including harm to your landscaping. However, standard practice varies, so you need a specific roofing contract property protection clause. This clause should state the contractor is responsible for damage to your lawn, plants, and hardscaping caused by their crew. Always verify their insurance certificate before signing and ask how they handle claims for landscape damage.
What questions should I ask a roofing contractor about property protection?
Ask these questions before hiring: Do you have liability insurance that covers landscape damage? What specific tarps and walk boards will you use? How will you protect my gutters and siding during shingle removal? Where will you place the dumpster? And can you include a property protection clause in our contract? Their answers will tell you if they take preventative measures seriously or if you need to keep shopping.
How do I document property damage caused by roofing contractors?
Document damage by taking dated photos and videos of your property before work starts, focusing on landscaping, gutters, and siding. If damage occurs, photograph it immediately before any cleanup. Notify the crew lead on site the same day and follow up in writing via email. Reference the property protection clause in your contract. If needed, you can file a claim with the contractor's liability insurance to cover the repair costs.