 how-to
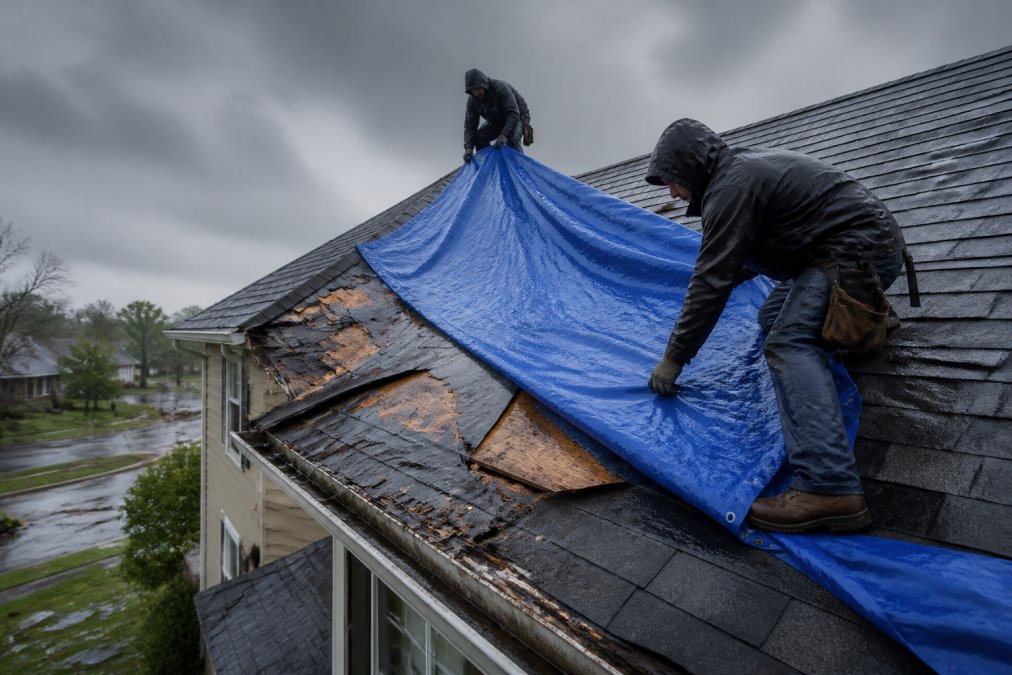
Emergency Roof Repair: What to Do Right Now
Table of Contents
- Signs You Need Immediate Roof Repair
- Emergency Roof Repair: Your First Steps
- Temporary Roof Tarping Techniques for Storm Damage
- How to File a Roof Insurance Claim
- Common Causes of Roof Leaks and Water Intrusion
- Professional Emergency Roof Repair Services
- Cost Estimation Factors for Emergency Repairs
- Roof Maintenance to Prevent Future Emergencies
- Frequently Asked Questions
Last Updated: August 31, 2026
Signs You Need Immediate Roof Repair
Water stains on your ceiling or missing shingles after a storm demand urgent attention. Emergency roof repair prevents catastrophic water intrusion that can compromise your home's structural integrity within days. What starts as a small attic leak becomes thousands of dollars in mold remediation, rotted framing, and ruined insulation if left unchecked.
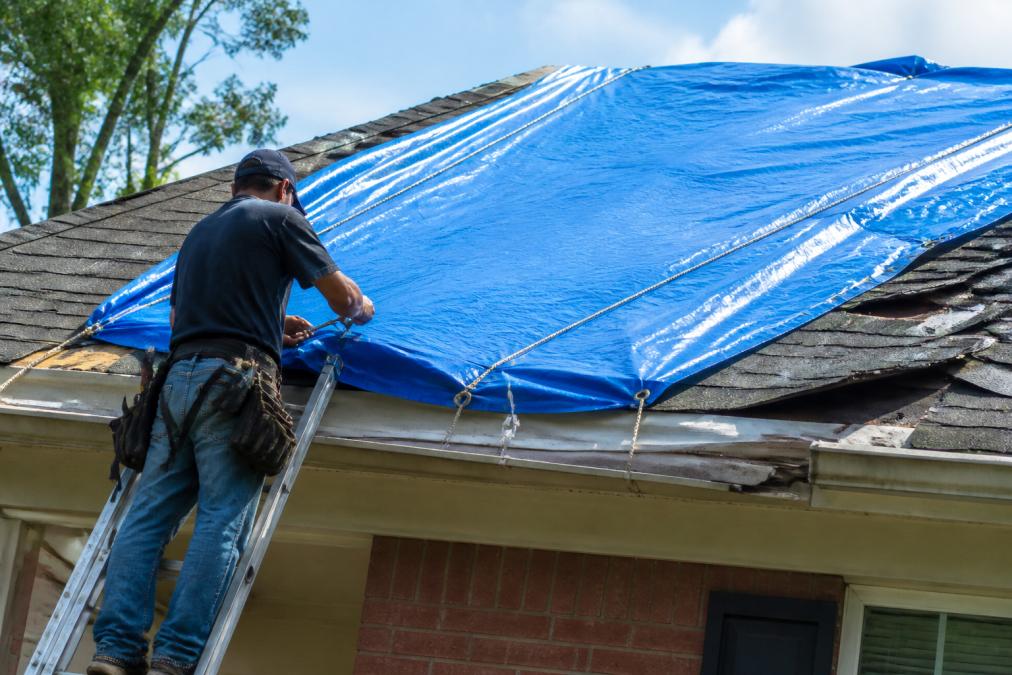
Common warning signs include visible roof sagging, granules from asphalt shingles in gutters, daylight visible through the attic, or water dripping during rainfall. Storm damage creates the most urgent scenarios: hail impact marks, bent flashing, or entire shingle sections torn away by wind. Moisture accumulates in insulation and decking long before water reaches your ceiling, by the time you see interior stains, damage behind the walls has already begun.
Emergency Roof Repair: Your First Steps
When you discover roof damage, your immediate priority is stopping water from entering your home. The first 24 hours are critical.
Document everything with photographs and video, capturing wide shots of overall damage, close-ups of specific problem areas, and any interior water damage. This documentation is essential for your insurance claim. Don't enter your attic if water is actively present, wet materials create slip hazards and electrical risks.
Identify whether damage is contained to one area or widespread. A single damaged section might allow temporary tarping for several days. Extensive damage requires professional emergency repair services. If your roof is actively leaking into living spaces, move valuables away and place buckets to catch water.
Contact your insurance company immediately. Most homeowner policies cover sudden, accidental damage like storms, but coverage varies. Document your call with the date, time, and representative's name. Ask about coverage limits, deductibles, and whether they require estimates from licensed contractors before authorizing work.
Temporary Roof Tarping Techniques for Storm Damage
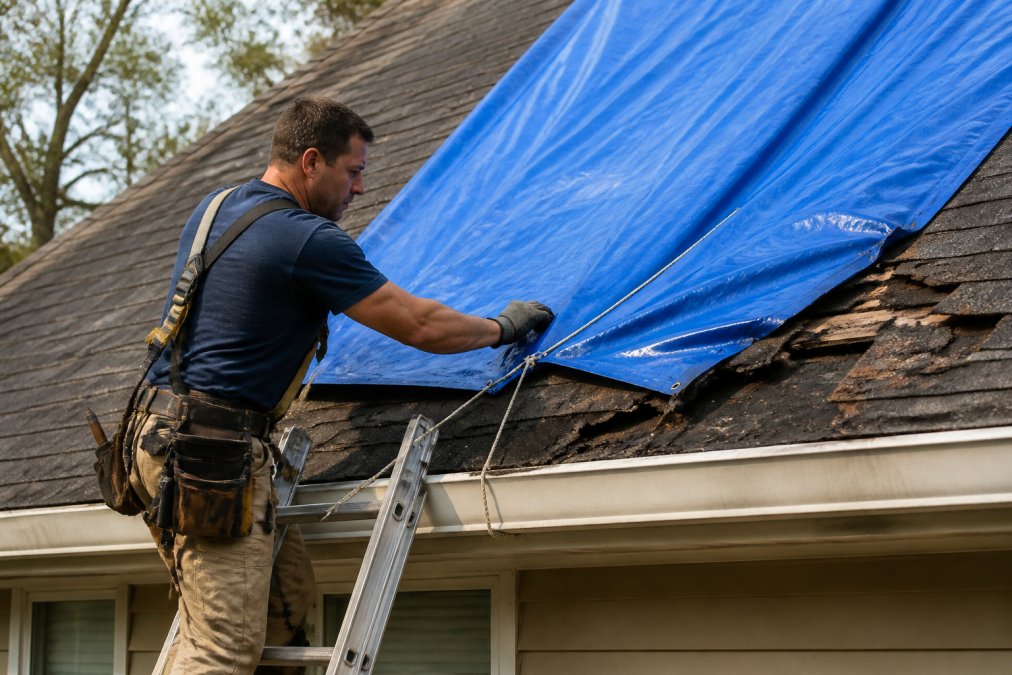
Temporary tarping is your first line of defense against ongoing water intrusion while you arrange professional repair. A properly installed tarp can prevent additional damage for several days or weeks, buying time for contractor estimates and insurance processing.
Safety Considerations Before Tarping
Never attempt roof work during active weather or immediately after a storm. Wait until conditions stabilize, wind, rain, and slippery surfaces create serious fall hazards. If you're uncomfortable working at heights or the damage is extensive, call professionals.
Inspect your ladder before use. Ensure it's stable, positioned on level ground, and extends at least three feet above the roof edge. Wear rubber-soled shoes with good traction and consider a safety harness if your roof pitch is steep.
Step-by-Step Tarping Process
Gather Your Materials: You'll need a heavy-duty tarp (at least 6 mil polyethylene, sized to cover the damaged area plus 4-6 feet in all directions), rope or tarping straps, a hammer, and roofing nails or fasteners.
Measure and Cut: Determine the damaged area's dimensions, then add 4-6 feet on all sides. This overlap ensures water flows away from the damage rather than under the tarp edges.
Position the Tarp: Drape the tarp over the damaged area, ensuring it covers the entire problem zone plus overlap margin. The tarp should slope downward toward the eaves, following the roof's natural pitch.
Secure the Edges: Use roofing nails or tarp fasteners to secure the tarp's edges to the roof decking. Space fasteners 12-18 inches apart around the perimeter. Drive fasteners through the tarp's edge hem or reinforced corners, never through the middle, as this creates new leak points.
Reinforce High-Wind Areas: If wind is a concern, add rope across the tarp in an X pattern, anchoring it to secure points like roof vents, chimneys, or the fascia.
Check for Water Flow: After installation, observe how water flows during the next rainfall. Water should run down the tarp and off the roof edge, not pool or flow toward undamaged areas.
A temporary tarp typically lasts 2-4 weeks before UV exposure and wind stress degrade it (nist.gov). Plan to have professional repair completed within this window.
How to File a Roof Insurance Claim
Insurance claims for roof damage follow a structured process. Understanding each step prevents delays and ensures you receive entitled coverage.
Step 1: Report the Damage Promptly. Contact your insurance company within 24-48 hours of discovering damage. Provide your policy number, the date damage occurred, a brief description, and the damage location.
Step 2: Document Everything Thoroughly. Take photographs and video of all visible damage, both exterior and interior. Capture wide shots showing context and close-ups of specific problem areas. Include photos of water stains, damaged shingles, compromised flashing, and any interior water damage.
Step 3: Obtain Professional Estimates. Your insurance company will likely require estimates from licensed, insured contractors before approving the claim. Get at least two estimates so the insurance company can verify the damage assessment and repair cost.
Step 4: Schedule the Insurance Adjuster's Inspection. The insurance company will send an adjuster to inspect the damage and determine coverage. Be present during inspection and point out all damage, including less obvious issues like water intrusion in the attic.
Step 5: Review the Claim Settlement. Once the adjuster completes inspection, the insurance company sends a settlement offer outlining approved coverage, deductible, and payout amount. Review this carefully against your estimates. If the settlement seems low, you can dispute it and request a second opinion.
Documentation Checklist
- Date and time damage was discovered
- Weather conditions at time of damage
- Photographs of exterior damage from multiple angles
- Close-up photos of damaged shingles, flashing, gutters
- Video walkthrough of roof damage and interior water damage
- Photos of water stains, mold, or interior damage
- Detailed written description of what happened
- Insurance policy number and contact information
- Name and contact information for assigned adjuster
- Copies of all contractor estimates (at least two)
- Receipts for emergency repairs or temporary measures
- Documentation of additional damage discovered during professional inspection
- Communication records with insurance company
Organized documentation accelerates the claims process and strengthens your position if disputes arise.
Common Causes of Roof Leaks and Water Intrusion
Understanding what causes roof leaks helps you recognize damage quickly and prevent future problems.
Storm Damage and Wind. High winds tear shingles away and damage flashing that seals roof penetrations. Hail impact weakens shingles by cracking the asphalt coating, allowing water penetration even if the shingle remains in place.
Flashing Failure. Flashing is the metal trim that seals roof penetrations, chimneys, vents, skylights, and valleys. Flashing deteriorates from UV exposure and poor installation. When flashing fails, water runs behind shingles and into the structure. Flashing is the most common source of roof leaks in homes over 10 years old (fema.gov).
Clogged Gutters and Downspouts. Debris accumulation prevents water drainage, causing water to back up under roof shingles. This is particularly problematic in valleys and along roof edges.
Deteriorated Shingles. Asphalt shingles lose their protective granule coating over time, exposing the underlying asphalt to UV damage. Curling, cracking, and missing shingles create direct pathways for water. Shingles typically last 15-20 years (the CDC).
Ice Dams. In cold climates, heat from your attic melts snow on the roof. Meltwater refreezes at the roof edge, creating an ice dam that prevents drainage. Water backs up under shingles and leaks into the attic. Proper attic insulation and ventilation prevent ice dams.
Poor Ventilation. Inadequate roof ventilation traps moisture in the attic, leading to mold growth and rot. Proper ventilation requires both intake vents (soffit) and exhaust vents (ridge or gable) to create airflow.
Professional Emergency Roof Repair Services
When DIY measures aren't sufficient or damage is extensive, professional emergency roof repair services provide the expertise and speed necessary to prevent catastrophic damage. Licensed contractors assess the full scope of damage, including hidden problems homeowners typically miss, and complete repairs efficiently.
Professional roofers have the equipment, materials, and experience to work safely on damaged roofs. They understand local building codes, insurance requirements, and material specifications. They can identify secondary damage, water intrusion in the attic, compromised structural members, or mold growth requiring additional remediation.
Residential Roofing Solutions
Residential emergency roof repair addresses damage to single-family homes, townhouses, and small multi-unit properties. Common residential roofing materials include asphalt shingles, architectural shingles, metal roofing, and tile. Each material requires different repair techniques and specialized knowledge.
Asphalt shingle roofs are the most common residential option and typically the most affordable to repair. Damage usually involves shingle replacement, flashing repair, and underlayment restoration. Certified Roofing Solutions Inc. provides residential roofing solutions across various material types, assessing damage thoroughly, documenting findings for insurance purposes, and completing repairs to restore your roof's structural integrity.
Storm Damage Restoration and Roof Inspection
Storm damage restoration goes beyond simple repairs. It involves comprehensive roof inspection to identify all damage, visible and hidden, and a restoration plan addressing immediate leaks and preventing future problems.
Professional roof inspections use multiple assessment methods. Visual inspection from the ground identifies obvious damage like missing shingles or damaged flashing. Close-up inspection from the roof surface reveals granule loss, hairline cracks, and deterioration homeowners miss. Attic inspection identifies water stains, mold growth, and structural damage indicating where water has entered.
Thermal imaging and moisture detection equipment can identify water intrusion not yet visible to the naked eye. A comprehensive storm damage restoration includes temporary measures to stop ongoing water intrusion, documentation for insurance purposes, permanent repairs to restore the roof, and recommendations for preventative maintenance.
Cost Estimation Factors for Emergency Repairs
Emergency roof repair costs vary based on damage extent, roof material, accessibility, and local labor rates. Understanding these factors helps you evaluate contractor estimates.
Damage Extent. Repair costs scale with the area affected. A single damaged section costs far less than damage spanning multiple roof planes. Widespread damage may trigger insurance coverage, while isolated damage might fall below your deductible.
Roof Material and Complexity. Asphalt shingle repair is generally the most affordable option. Metal roofing, tile, and specialty materials cost more due to material expense and specialized labor. Steep roof pitches, complex geometries with multiple valleys, and difficult-to-access areas increase labor costs.
Hidden Damage. Storm damage often creates secondary problems invisible from the ground. Water intrusion may have compromised underlayment, decking, or structural members. Mold remediation, insulation replacement, and structural repairs add significantly to total project cost. Professional inspection identifies these hidden costs before work begins.
Timeline and Urgency. Emergency repairs completed within 24-48 hours cost more than standard repairs scheduled during normal business hours. However, the cost of emergency response is typically far less than the cost of additional damage from delayed repairs.
When evaluating contractor estimates, ensure they're detailed and itemized. A quality estimate includes labor cost, material cost, equipment rental if applicable, timeline, warranty terms, and a clear scope of work.
Roof Maintenance to Prevent Future Emergencies
The most cost-effective approach to emergency roof repair is prevention. Regular maintenance extends roof lifespan, identifies problems before they become emergencies, and protects your home's structural integrity.
Annual Inspections. Schedule professional roof inspections annually and after any significant weather event. Inspections identify deterioration, damage, and maintenance needs before they escalate.
Gutter Maintenance. Clean gutters and downspouts twice yearly, in spring and fall. Debris accumulation prevents water drainage and creates conditions for water intrusion. Ensure downspouts direct water at least 4-6 feet away from your foundation.
Trim Overhanging Branches. Tree branches hanging over your roof drop debris into gutters, damage shingles, and create pathways for pests. Trimming branches improves roof longevity and reduces maintenance needs.
Address Moss and Algae Growth. In humid climates, moss and algae growth accelerates shingle deterioration. Professional cleaning removes growth and extends shingle lifespan. Zinc strips installed along the roof ridge inhibit regrowth.
Monitor Flashing and Penetrations. Regularly inspect flashing around chimneys, vents, and skylights. Deteriorated caulk should be replaced with roofing cement. Loose fasteners should be tightened.
Ensure Proper Ventilation. Adequate attic ventilation prevents moisture accumulation and extends roof lifespan. Ensure soffit vents are clear and ridge vents are unobstructed.
Inspect After Weather Events. After high winds, hail, or heavy rain, conduct a visual inspection from the ground or have a professional inspect. Early detection prevents emergency situations.
Frequently Asked Questions
Q: How urgent is emergency roof repair after a storm?
A: Roof damage requires immediate attention to prevent water intrusion and structural damage. Even small leaks can cause significant moisture damage, mold growth, and decay in your attic and home structure within days. If you notice signs of storm damage, missing shingles, visible leaks, or water stains, contact a licensed contractor immediately. Temporary tarping can provide short-term protection while you arrange permanent repairs, but professional assessment and restoration should not be delayed.
Q: What should I document for a roof insurance claim?
A: Photograph all visible damage from multiple angles before repairs begin. Document the date of the storm, weather conditions, and any interior water damage. Collect receipts for temporary repairs or emergency services. Note the age and condition of your roof before damage. Keep detailed records of contractor estimates and communications. Your insurance adjuster will need this documentation to process your claim fairly. Proper documentation helps ensure you receive full coverage for both visible and hidden damage discovered during repairs.
Q: Can I temporarily repair my roof myself, or do I need a professional?
A: Temporary tarping is a short-term solution you can attempt if you're comfortable with heights and basic safety precautions. However, professional inspection is essential to identify all damage, including water intrusion in the attic and structural concerns invisible from the surface. Many homeowners miss hidden damage that becomes costly later. A licensed contractor can perform both emergency stabilization and thorough assessment in one visit, ensuring nothing is overlooked and your repair estimate covers the full scope of work.
Q: What are the most common causes of roof leaks during storms?
A: Storm damage typically results from high winds lifting or removing shingles, hail impact creating cracks, and water intrusion through compromised flashing around chimneys, vents, and valleys. Older roofs with curling or deteriorated shingles are more vulnerable. Clogged gutters prevent water drainage, forcing it under shingles. Poor roof ventilation accelerates deterioration. Regular maintenance and roof inspections identify weak points before storms strike. After a storm, professional inspection reveals all damage, both obvious and hidden, so your repair plan is complete and prevents future leaks.
When emergency roof repair becomes necessary, the speed of your response determines whether you prevent cascading damage or face expensive structural repairs. Certified Roofing Solutions Inc. provides 24/7 emergency response, comprehensive damage assessment, and professional repairs that restore your roof's integrity and protect your home. Contact us today to schedule an emergency inspection or discuss preventative maintenance that protects your investment.