 how-to
Commercial TPO Roofing Installation Process Guide
Table of Contents
- What Makes TPO Roofing Installation Different from Other Systems
- TPO Roofing Installation Tools You Need on the Job
- Step 1: Roof Deck Preparation and Insulation Installation
- Step 2: Rolling Out and Securing the TPO Membrane
- TPO Membrane Heat Welding Techniques for Seam Integrity
- Flashing, Drainage, and Detail Work in the TPO Installation Process
- OSHA Safety Requirements for Commercial Roofing Work
- Post-Installation Maintenance, Troubleshooting, and Climate Considerations
- Frequently Asked Questions
Last Updated: August 16, 2026
What Makes TPO Roofing Installation Different from Other Systems
TPO combines the heat-weldable seam technology of PVC with the chemical resistance and cost profile of EPDM rubber, creating a thermoplastic polyolefin membrane that outperforms both in most commercial applications. TPO membranes are heat-welded together using a hot-air welder, creating a monolithic waterproofing bond typically stronger than the membrane itself, unlike EPDM, which relies on adhesive tape, a fundamentally weaker connection point. TPO also carries a reflective white surface that reduces rooftop heat absorption and improves energy performance.
Three characteristics define TPO installation versus other systems:
- Seam method: Heat welding, not adhesive bonding
- Membrane flexibility: TPO accommodates thermal expansion and contraction without cracking
- Attachment options: Mechanically fastened, fully adhered, or ballasted systems are all viable
TPO Roofing Installation Tools You Need on the Job
Showing up to a commercial TPO installation without the right equipment produces defective seams and failed inspections.
Core equipment required:
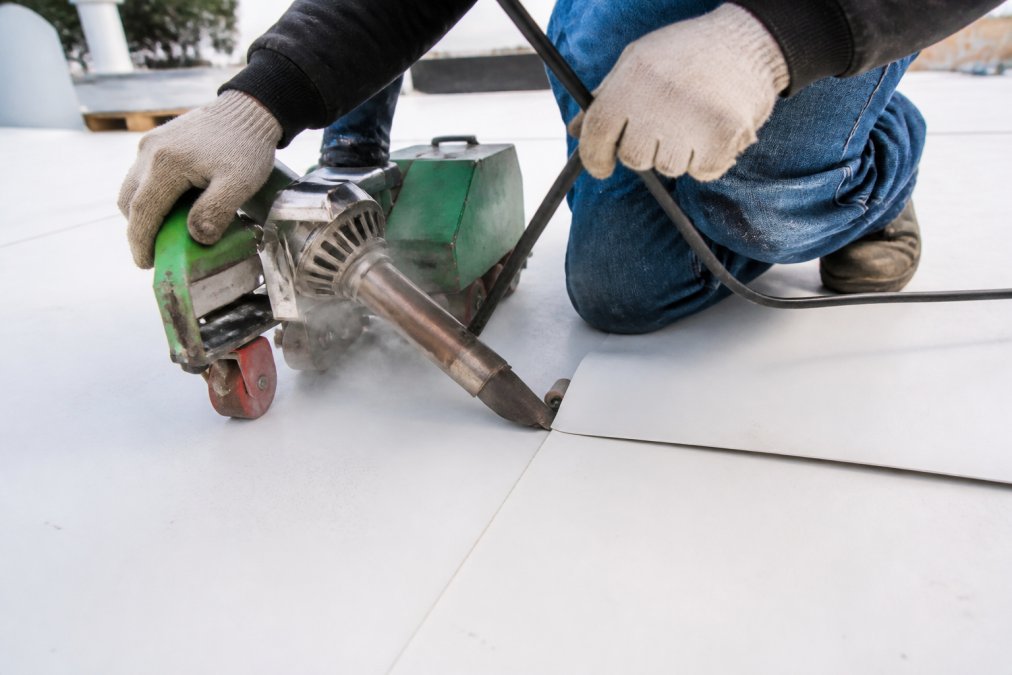
- Automatic hot-air welder: Maintains consistent nozzle temperature and travel speed for uniform seam fusion.
- Hand welder: Used for detail work, corners, and areas the automatic machine cannot reach.
- Seam probe: A blunt metal tool used to test seam integrity immediately after welding.
- Roofing fasteners and fastener plates: Secure the membrane and insulation board to the roof deck.
- Chalk line and tape measure: Mark membrane overlap requirements precisely, typically 6 inches for field seams.
- Membrane roller: A weighted roller used in fully adhered installations to press the membrane into adhesive.
- Utility knife and hook blades: For cutting membrane sections cleanly.
- Screw gun with torque setting: For installing roofing fasteners to the correct depth.
- Thermometer and anemometer: Wind speed and ambient temperature directly affect welder settings and adhesion cure times.
A calibrated nozzle thermometer for the hot-air welder separates professional crews from inexperienced ones. Actual nozzle temperature can drift 50 degrees from the machine's display, enough to produce a cold weld that looks complete but fails under water pressure.
Step 1: Roof Deck Preparation and Insulation Installation
Substrate preparation is where most TPO installation failures originate. A membrane is only as good as what it sits on.
Inspecting and Preparing the Substrate
The roof deck must be structurally sound, clean, dry, and free of debris, standing water, or deteriorated material before any insulation board or membrane is laid. Walk the entire deck before ordering materials. Check for soft spots or deck deflection, rust on steel decks or rot on wood decks, residual adhesive or old membrane, and moisture in existing insulation using a moisture meter or infrared scan. Wet insulation must be removed entirely, installing new insulation over wet substrate traps moisture and accelerates deck deterioration.
Installing Insulation Board
Polyisocyanurate (polyiso) is the most common insulation board used in TPO systems because of its high R-value per inch. In mechanically fastened systems, insulation boards are secured to the deck using roofing fasteners and plates before the membrane goes down. In fully adhered systems, the insulation is often adhered to the deck with low-rise foam adhesive.
Stagger insulation board joints so they do not align with deck seam locations. For two-layer insulation systems, offset the second layer joints from the first by at least 6 inches in both directions.
| Installation Phase | Key Requirement | Common Mistake |
|---|---|---|
| Deck inspection | Dry, structurally sound surface | Skipping moisture testing |
| Insulation fastening | Staggered joints, correct fastener spacing | Joints aligned with deck seams |
| Membrane rollout | Relaxation period before fastening | Fastening before membrane relaxes |
| Seam welding | Consistent overlap and welder speed | Inconsistent travel speed |
| Flashing installation | Full adhesion at all terminations | Incomplete sealing at penetrations |
Step 2: Rolling Out and Securing the TPO Membrane
Unroll the membrane across the insulation surface and allow it to relax for at least 30 minutes before fastening. TPO is manufactured under tension and needs time to release that tension and lay flat. Fastening a membrane that has not relaxed creates stress concentrations at every fastener location.
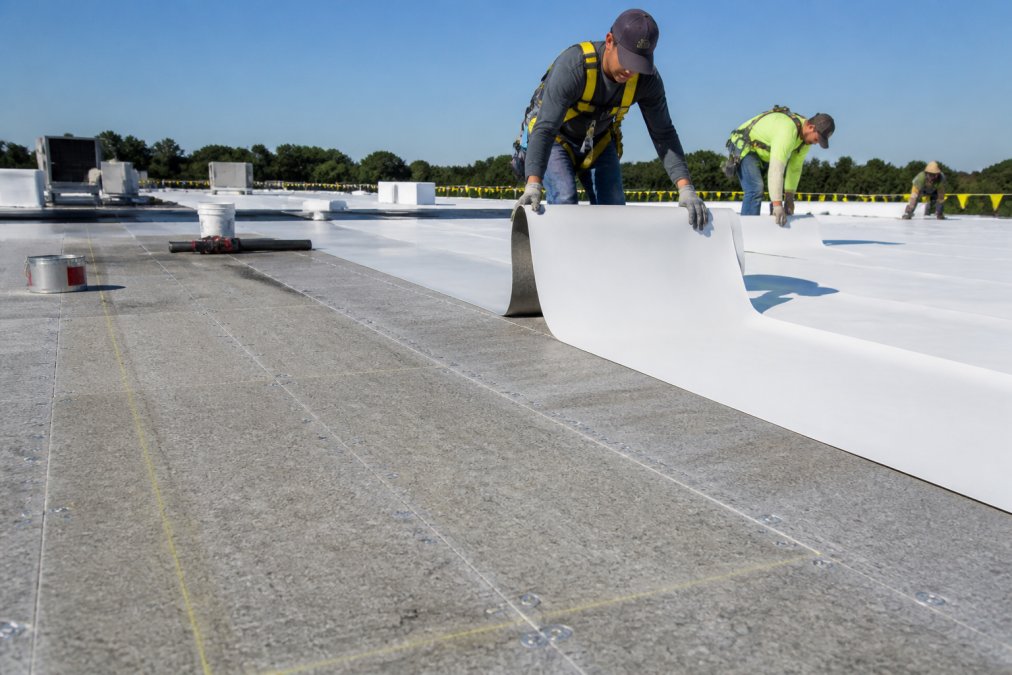
Position membrane sheets so field seams run parallel to the slope direction, allowing water to flow across seams rather than into them.
Mechanical Fastening Techniques and Perimeter Securement
Mechanical fastening is the most common attachment method for commercial TPO in wind-uplift-critical applications. Roofing fasteners with factory-supplied fastener plates are driven through the membrane's lapped edge into the insulation and deck below. The overlapping sheet then covers the fastener row, which is subsequently heat-welded to create a continuous waterproof surface.
Perimeter securement follows stricter fastener spacing requirements than field areas because wind uplift forces are highest at roof edges and corners. The FM Global property loss prevention data sheets provide wind uplift ratings that govern fastener spacing for specific roof zones. Always verify the required fastener pattern for your building's wind exposure category before installation.
Fully Adhered vs. Ballasted System: Choosing the Right Method
A fully adhered system bonds the membrane directly to the insulation using solvent-based or water-based adhesive, producing a clean, low-profile roof with excellent wind resistance and is preferred for curved or irregular roof geometries.
A ballasted system lays the membrane loosely and holds it in place with river-washed stone or concrete pavers. Installation is faster, but the added dead load requires structural verification, and ballasted systems are not appropriate for steep low-slope applications where stone can shift.
TPO Membrane Heat Welding Techniques for Seam Integrity
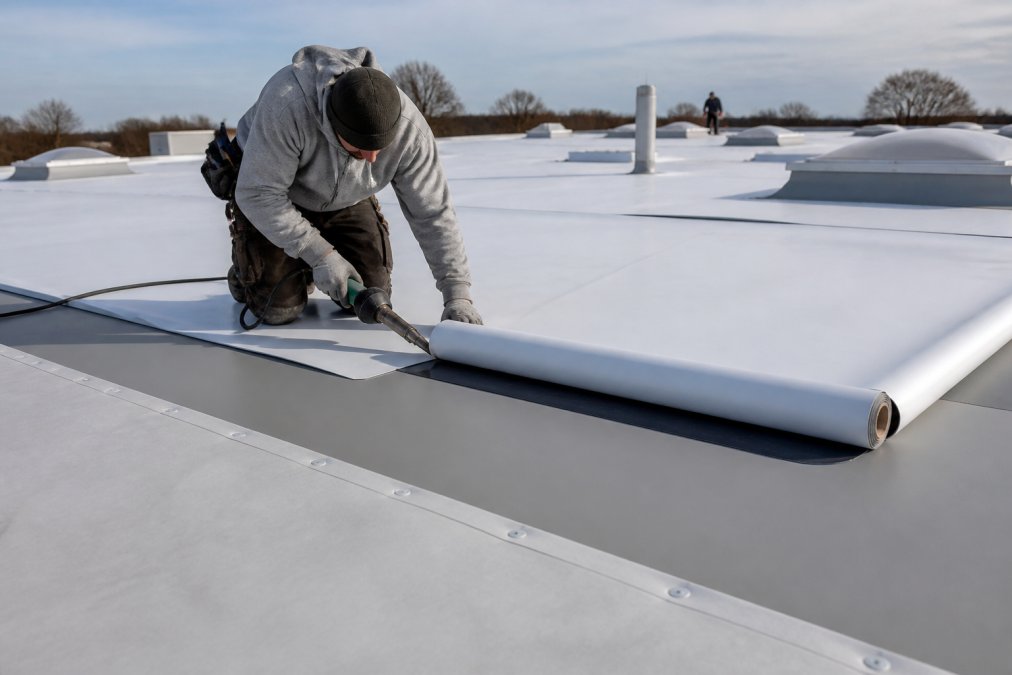
Seam welding is the technical heart of TPO roofing installation. A properly welded seam creates a bond stronger than the membrane itself. A poorly welded seam is a leak waiting to happen.
Hot-Air Welder Settings and Overlap Requirements
Automatic hot-air welder settings vary by membrane thickness, ambient temperature, and wind conditions. Thicker membranes require higher temperatures and slower travel speeds. Cold weather requires higher nozzle temperatures to compensate for heat loss to the substrate. Wind accelerates heat dissipation and may require temporary windbreaks around the weld zone.
Standard field seam overlap is a minimum of 6 inches, with at least 1.5 inches of that overlap forming the actual weld zone. T-joint locations, where three membrane layers meet, require special attention. The top membrane must be cut back at a 45-degree angle before welding to prevent a thick, unwelded gap at the joint center.
Always run a test weld on a scrap piece of membrane before beginning production welding each day. Pull the test weld apart by hand. A properly welded seam tears through the membrane body, not along the weld interface. If the seam peels cleanly, the temperature or speed needs adjustment.
Testing Seam Integrity with a Seam Probe
A seam probe is a blunt, rounded metal tool used to test seam integrity while the weld is still warm. Run the probe tip along the entire length of every seam within a few minutes of welding. Apply firm lateral pressure toward the seam edge. Any area where the probe tip can be pushed under the membrane indicates an incomplete weld. Mark failed sections immediately with chalk and repair them before the membrane cools.
Flashing, Drainage, and Detail Work in the TPO Installation Process
Every penetration, pipe boot, HVAC curb, drain, parapet wall, and expansion joint requires continuous, fully adhered flashing that transitions waterproofing from the horizontal field to vertical surfaces. TPO flashing is cut from the same membrane material and heat-welded to the field sheet, then adhered to vertical surfaces using bonding adhesive.
Detail work sequence matters:
- Install all penetration flashings before running field membrane to the penetration area
- Weld field membrane to the pre-installed flashing boot
- Seal all termination bars at wall flashings with lap sealant
- Confirm drain assemblies are set at the correct elevation; TPO membrane must slope toward drains at a minimum of 1/4 inch per foot
Roof drainage design is critical in TPO installation because standing water at seam locations accelerates seam degradation. If existing drainage is inadequate, address it before the new membrane goes down.
OSHA Safety Requirements for Commercial Roofing Work
OSHA safety requirements for commercial roofing are defined primarily under OSHA 29 CFR 1926 Subpart R, Steel Erection and Subpart M, Fall Protection, with fall protection being the central compliance requirement for any work at height.
For commercial roofing work on low-slope roofs with a pitch of 4:12 or less, OSHA requires fall protection for workers within 6 feet of an unprotected roof edge. Acceptable fall protection systems include guardrail systems, safety net systems, personal fall arrest systems, and safety monitoring systems under specific conditions.
Beyond fall protection, commercial roofing sites require ladder safety compliance per OSHA 1926.1053, tool and material securing to prevent objects falling to lower levels, heat illness prevention protocols during warm-weather installations, and respiratory protection when working with solvent-based adhesives in enclosed or partially enclosed areas.
Post-Installation Maintenance, Troubleshooting, and Climate Considerations
A properly installed TPO roofing system can deliver many years of service, but only with active maintenance.
Maintenance Schedule for TPO Roofing System Longevity
- Twice annually (spring and fall): Full visual inspection of all seams, flashings, penetrations, and drains. Clear debris from drain sumps. Check for membrane punctures.
- After every major storm: Inspect for wind-lifted membrane edges, displaced ballast (ballasted systems), or debris impact punctures.
- Every 3-5 years: Infrared scan of the membrane to detect subsurface moisture infiltration before it reaches the deck.
- As needed: Reapply lap sealant at termination bars when cracking or separation is visible.
Document every inspection in writing. For commercial property managers, inspection records are often required by insurers and can be critical when filing storm damage claims.
Troubleshooting Common TPO Installation Errors
Blistering or bubbling membrane: Caused by moisture trapped beneath the membrane during installation or adhesive applied to a wet substrate. Small blisters can be slit, dried, and re-adhered. Large blistered areas require membrane removal and substrate drying before re-installation.
Seam edge lifting: Typically caused by cold welding, insufficient overlap, or membrane fastened before relaxing. Repair requires cutting back the lifted edge, cleaning the weld zone, and installing a cover strip welded on both sides.
Ponding water at field areas: Often indicates insufficient slope or settled insulation. Tapered insulation crickets can redirect flow without full membrane removal.
Climate-Specific Adjustments and Sustainability Benefits
Cold-weather installation requires specific adjustments. TPO membrane becomes stiffer below 40°F, making it more prone to cracking during unrolling and more difficult to weld consistently. Store membrane rolls in a heated space the night before installation. Increase welder nozzle temperature incrementally and run additional test welds before production welding begins.
Hot-weather installation carries different risks. Adhesive for fully adhered systems has a shorter working time in high heat. Apply adhesive in smaller sections and work quickly.
From a sustainability standpoint, TPO's reflective white surface reduces rooftop solar heat gain, lowering cooling loads in commercial buildings and reducing energy consumption compared to dark-surface membrane systems. TPO membrane is also recyclable at end of life, a meaningful advantage for commercial properties pursuing sustainability certifications.
Commercial property managers who need a TPO installation done right the first time face a real risk: contractors who know residential shingles but not membrane welding. Certified Roofing Solutions Inc. specializes in commercial TPO roofing installation alongside full residential services, bringing experienced crews who understand seam integrity, flashing detail work, and the inspection documentation that protects your property long-term. Book an appointment with Certified Roofing Solutions Inc. today and get a commercial roofing assessment from professionals who actually know the material.
Frequently Asked Questions
What are the main steps in the commercial TPO roofing installation process?
The commercial TPO roofing installation process follows six core stages: inspecting and preparing the roof deck, installing insulation board using mechanical fasteners or adhesive, rolling out the thermoplastic polyolefin membrane with proper overlap, securing it through mechanical fastening or full adhesion, heat welding all seams with a hot-air welder, and completing flashing and drainage detail work. Each stage directly affects waterproofing performance and roofing system longevity, so skipping or rushing any step creates vulnerabilities that lead to leaks.
How long does it take to install a TPO roof on a commercial building?
Installation time depends on roof size, complexity, attachment method, and weather conditions. A straightforward low-slope roofing project on a small commercial building may take two to three days, while larger or more complex roofs with significant flashing and drainage detail work can take one to two weeks. Fully adhered systems generally take longer than mechanically fastened systems. Curing time for adhesives and weather delays also factor in. A qualified roofing contractor will provide a project-specific timeline after inspecting the substrate.
What are the most common TPO roofing installation mistakes to avoid?
The most frequent errors include inadequate substrate preparation, insufficient membrane overlap at seams, incorrect hot-air welder temperature settings that produce weak or burnt welds, skipping the seam probe test after welding, and improper flashing around penetrations and edges. Thermal expansion is often underestimated, leading to stress at seam points over time. Failing to account for roof drainage slope is another costly oversight. These mistakes compromise seam integrity and UV resistance, shortening the roofing membrane's service life significantly.
Does TPO roofing require a professional installer?
Yes. Commercial TPO roofing installation involves heat-weldable thermoplastic polyolefin membranes that require calibrated hot-air welding equipment, knowledge of OSHA safety requirements for commercial roofing, and experience reading substrate conditions. Improper seam welding is the leading cause of TPO roof failure and is nearly impossible to detect visually without a seam probe test. Attempting installation without proper training risks voiding manufacturer warranties and creating waterproofing failures that cost far more to remediate than professional installation.